
TL;DR
Moving your rig into another room is the most effective way to cut noise. For closet setups, proper ventilation and targeted treatment prevent heat buildup and echo, making your workspace quieter and cooler. Treat reflection points and seal gaps for best results.
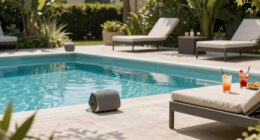
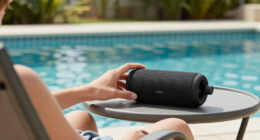
Ever notice how loud your high-powered AI rig sounds when it’s sitting just a few feet away? That noise can be distracting, or even irritating. But what if the best fix isn’t more foam or soundproof panels? What if it’s simply putting the rig somewhere else — like a closet — where the noise doesn’t reach you at all?
This article shows you how to get serious about noise reduction, using practical placement tricks and clever treatment. You’ll learn why distance beats absorption, how to set up a rig in a small space without cooking your hardware, and the secrets to making your closet setup work without turning it into a sauna.
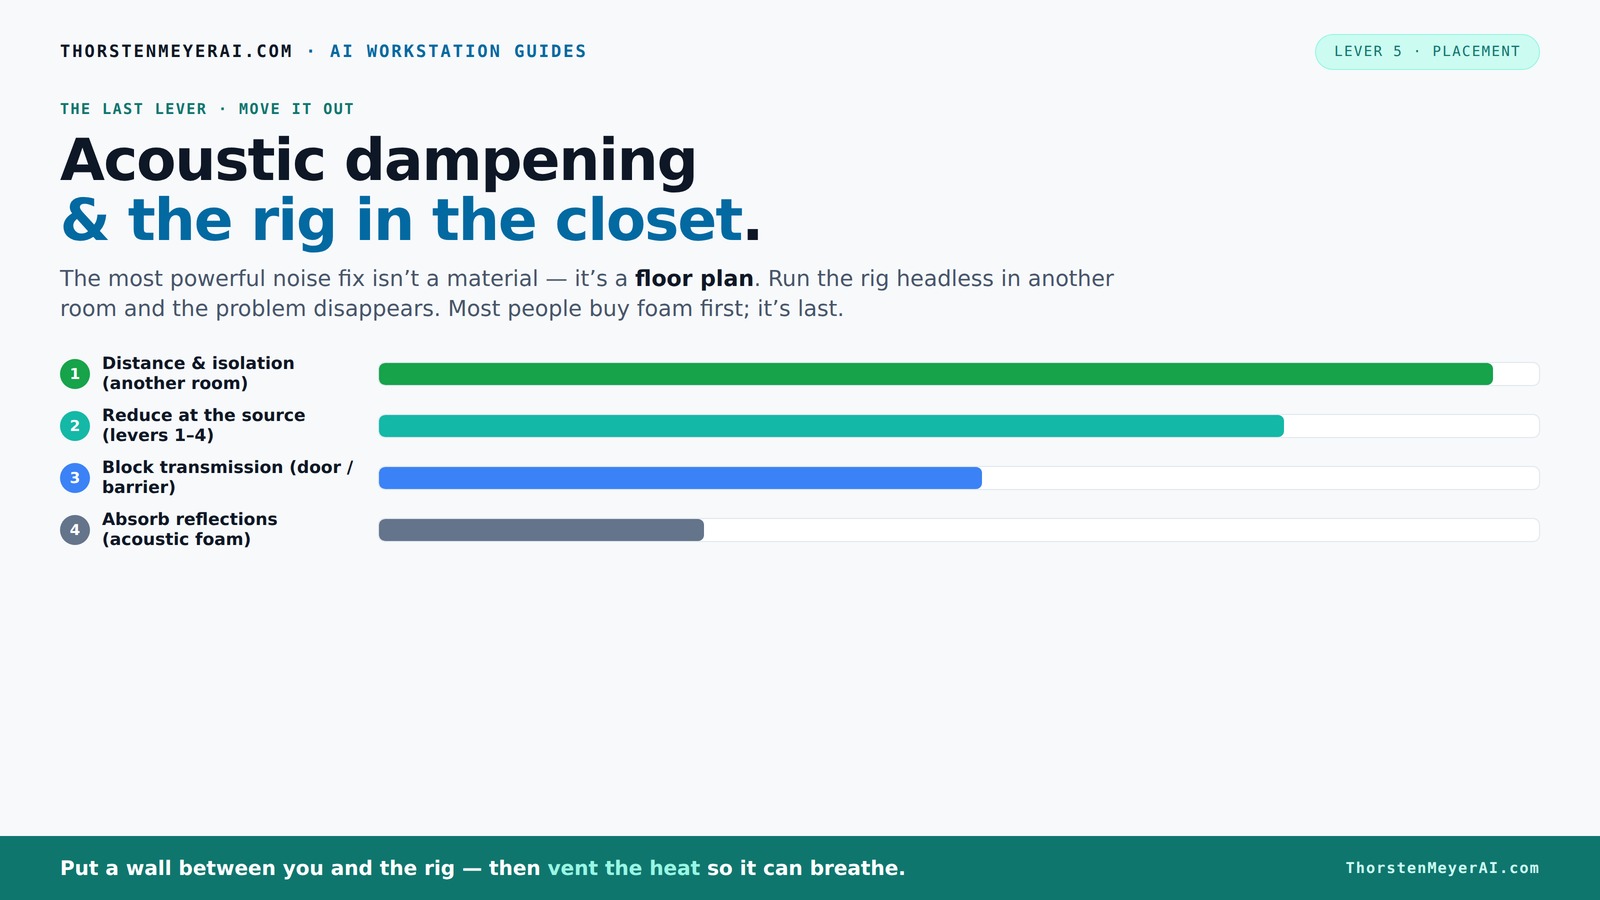
Acoustic dampening
& the rig in the closet.
The most powerful noise fix isn’t a material — it’s a floor plan. A rig you can’t hear because it’s in another room beats any amount of foam. Tap the approaches in Part 1 to see what actually works.
(another room)
(levers 1–4)
(door / barrier)
(acoustic foam)
Contain the noise, not the heat
Key Takeaways
- Move your high-powered rig into a separate room or closet whenever possible to eliminate most noise at the source.
- Proper ventilation and airflow are critical when placing a rig in a sealed closet to prevent overheating and hardware damage.
- Target treatment at reflection points, especially on side walls and above the workspace, for effective acoustic control in small spaces.
- Seal gaps around closet doors with weatherstripping and acoustic sealant to minimize sound leaks.
- Bass traps and thick panels in corners are essential for controlling low-frequency buildup in tiny rooms or closets.

Soundproof Room Divider W/Wheels, 66in Office Dividers for Sound Proofing & Reducing, Sound Proof Dividers for Office Partitions Portable Acoustic Wall Divider (Dark Grey, 4 Panel-95''Wide)
- Noise Reduction: Absorbs at least 85% of noise
- Eco-Friendly Material: Made of flame-retardant PET with fabric
- Easy Mobility: Self-lockable universal wheels for smooth movement
As an affiliate, we earn on qualifying purchases.
As an affiliate, we earn on qualifying purchases.
Why Distance Is the #1 Noise Fix — And How It Changes Everything
Moving your rig into another room or closet isn’t just a good idea — it’s the most effective way to cut noise. Think of it like a sound barrier that’s almost impossible to beat. When you’re physically separated from the source, the noise levels drop dramatically — sometimes by 20-30 decibels.
Imagine having a noisy GPU rig in the corner of your office. Now picture that same rig behind a closed door or in a basement. The sound that reaches your ears might be barely noticeable, even if the fans are loud enough to roar in an open space. This is because sound intensity diminishes with distance — a principle rooted in physics. The farther you are from the source, the less sound energy reaches your ears, effectively reducing perceived loudness.
For AI workstations, where remote access often means no need to be near the hardware, this approach is especially beneficial. It allows you to keep your workspace quiet without investing heavily in expensive soundproofing materials. Plus, it provides a clear tradeoff: the more you isolate the rig, the less noise escapes, but you need to consider accessibility and maintenance.
Experts agree that this simple move often outweighs expensive absorption treatments. It’s about understanding the physics of sound propagation — distance acts as a natural barrier, reducing noise with minimal cost and effort. However, it’s important to weigh convenience against practicality — relocating hardware might not always be feasible, but when it is, it’s a game-changer.
The “Rig in the Closet” Setup — How to Keep It Cool and Quiet
Placing a rig inside a closet sounds perfect — no noise, no distraction. But the biggest challenge? Heat. A high-end GPU can generate over 600W of heat, and sealing it inside a small space without airflow will turn your closet into a sauna, risking hardware failure and performance drops.
Here’s why heat management is critical: excessive temperatures can lead to thermal throttling, reduced lifespan, and even hardware damage. The tradeoff between noise reduction and cooling is delicate; you want to contain the noise but not at the expense of overheating. That’s why implementing an effective ventilation system is essential. Without it, your hardware might stay cool enough to operate, but the ambient temperature inside the closet could easily surpass safe limits, especially during prolonged use.
To do it right, consider these steps:
- Active ventilation: Installing a quiet exhaust fan or ducted vent isn’t just about noise; it’s about maintaining a stable temperature. Passive vents may seem simpler, but they often don’t provide enough airflow during heavy loads, risking heat buildup.
- Don’t seal it completely: Use a vent or duct system that manages airflow while muffling noise. This prevents heat from accumulating and ensures fresh air circulates.
- Monitor ambient temperature: Use temperature sensors to keep an eye on heat levels. When temperatures approach critical thresholds, you can adjust fan speeds or shut down temporarily.
- Use cooling systems: An All-in-One (AIO) liquid cooler that exhausts heat outside the closet can help maintain stable temperatures. Consider placing radiator fans outside the closet or in an adjacent space for optimal cooling.
Balancing noise reduction with thermal management requires understanding your hardware’s heat output and airflow dynamics. It’s a tradeoff: too little ventilation risks overheating, too much can compromise noise reduction. The key is to find a system that effectively exhausts heat while keeping noise levels low, ensuring your hardware remains safe and your workspace stays quiet.
For detailed airflow solutions, check out this guide on reducing heat and noise in AI workstations. It covers everything from ducting to cooling components and offers insights into optimizing small-space setups for both silence and safety.
Targeted Placement of Acoustic Treatment for Small Spaces and Closets
Acoustic dampening isn’t about covering every inch — it’s about targeting the spots that matter most. In small rooms or closets, the main goal is to control reflections and prevent echo, which can make the space sound boxy and muddy. Proper placement of treatment materials can significantly improve sound clarity, making recordings and listening more precise.
Why does this matter? Because reflective surfaces cause sound waves to bounce around, creating phase issues and muddiness that degrade audio quality. In small spaces, these reflections are amplified, leading to a harsh, unnatural sound. Effective treatment can tame these issues, but only if placed strategically.
Here’s what to focus on:
- First reflection points: Use a mirror or the 'mirror trick' to identify where sound bounces off the walls and treat those spots first. Addressing these points reduces early reflections that interfere with direct sound, resulting in clearer audio.
- Behind the mic: Place panels behind your microphone to absorb sound bouncing back from the wall. This prevents phase cancellations and improves recording quality.
- Ceiling clouds: Install foam or panels above your workspace to cut down on overhead reflections. This step is especially important in small rooms where sound can bounce directly downward.
- Corners and bass traps: Use thicker panels or bass traps in corners to tame low-frequency buildup. In small spaces, bass can become boomy if not properly treated, which can muddy recordings and cause listening fatigue.
For example, a creator in a tiny closet used a few foam panels on the reflection points and a thick bass trap in the corner. The result? Significantly clearer recordings and a more balanced sound environment. This targeted approach maximizes acoustic benefits without turning the closet into a soundproof vault, preserving natural room characteristics while reducing harsh reflections.
How to Seal a Closet Door and Manage Sound Leaks
Sound leaks through gaps and poorly sealed doors, especially in small spaces. To minimize noise escape, focus on sealing every crack and gap. Weatherstripping and acoustic sealant are your best friends here because they create a barrier that prevents sound from passing through small openings.
Why does this matter? Because even tiny gaps can significantly reduce the effectiveness of your soundproofing efforts. Sound waves can easily pass through cracks, making your efforts to contain noise less successful. Proper sealing ensures that the noise generated inside stays inside, and external noise stays out, creating a more controlled environment.
Here’s a quick checklist:
- Weatherstrip the door: Use foam or rubber weatherstripping around the door frame for a tight seal. This reduces gaps where sound can escape.
- Seal gaps: Apply acoustic sealant or expanding foam in any cracks or holes around vents, electrical outlets, or other penetrations. This prevents sound from leaking through small openings.
- Add a door sweep: Attach a rubber or foam sweep to the bottom edge of the door. This blocks sound transmission from the gap underneath, which is often a significant leak point.
- Use blankets or acoustic panels: Hang a heavy blanket or specialized acoustic panel over the door for extra absorption. This can be especially useful if sealing alone isn’t sufficient or if the door is difficult to modify.
Sealing gaps isn’t just about soundproofing; it also improves thermal insulation, which helps keep the space cooler and more energy-efficient. For detailed sealing tips, see how to soundproof a closet door in soundproofing guides. It’s surprisingly straightforward, and the combined effect of sealing and treatment can dramatically increase your noise control.
Low-Frequency Challenges in Small Spaces & How to Tackle Them
Low-frequency sound waves are the hardest to control in tiny rooms or closets. These bass waves tend to bounce around, creating a boomy, muddy sound that can be fatiguing to listen to and difficult to mix properly. Without proper treatment, low-end frequencies can dominate the soundscape, causing imbalance and making it hard to distinguish individual elements.
Why is this a challenge? Because low frequencies have long wavelengths, they are less affected by typical absorption materials and tend to resonate in confined spaces. This resonance amplifies the bass, leading to a muddy, boomy environment that hampers clarity and accuracy. Managing this requires a strategic approach that targets these frequencies specifically.
Here’s what works:
- Deep bass traps: Use thicker panels (4-8 inches) placed in corners where low-frequency energy naturally accumulates. These traps absorb and dissipate low-end energy before it bounces around.
- Strategic placement: Position traps at the junction of walls and ceiling or floor to maximize their effectiveness. This helps prevent low-frequency buildup in the most problematic spots.
- Room tuning: Consider adding resonant panels tuned to specific bass frequencies. These can target problematic resonances, providing a more precise control over the low end.
- Use EQ and software: Complement physical treatment with software-based low-frequency correction. Equalizers can reduce problematic bass peaks, smoothing out the response and improving clarity.
Research indicates that in small rooms, bass trapping can reduce low-frequency energy by as much as 50%, significantly improving sound quality and preventing that annoying thump or muddiness. Proper treatment not only enhances listening and mixing accuracy but also prolongs the life of your equipment by reducing stress caused by excessive low-end vibrations.
Common Mistakes and How to Avoid Them
Many folks treat their space with foam panels all over, expecting silence. But that’s a mistake. Foam absorbs reflections but doesn’t block outside noise or prevent sound from bouncing around in hard surfaces. Relying solely on foam can give a false sense of security, leaving outside noise or echo issues unaddressed.
Other pitfalls include:
- Over-treating the room without improving ventilation or airflow. Excessive insulation can trap heat and create uncomfortable environments, especially in small spaces.
- Ignoring the desk and nearby hard surfaces that can cause echo or reflection near the mic. These surfaces can re-radiate sound and muddy recordings, regardless of treatment on other walls.
- Failing to treat reflection points or corners properly. Neglecting these critical areas means reflections persist, reducing clarity.
- Relying solely on foam panels instead of sealing gaps or adding bass traps. Without sealing, sound leaks undermine your efforts, and without bass trapping, low frequencies remain problematic.
Remember, good acoustic treatment balances absorption, diffusion, and soundproofing. It’s about controlling *inside* sound and *outside* leaks, not just buying foam. Properly designed treatments consider the room’s unique characteristics and the specific noise and reflection issues you face. A balanced approach ensures a quieter, clearer, and more comfortable workspace, avoiding costly mistakes and unnecessary expenses.
Frequently Asked Questions
Can foam panels really block outside noise?
No, foam panels mainly absorb reflections inside a room. They do little to block sound passing through walls or doors. For outside noise, focus on sealing gaps and adding mass or barriers.How do I prevent my closet rig from overheating?
Install a quiet exhaust fan or ducted vent to draw hot air out. Never fully seal the space without ventilation. Use temperature monitoring and consider liquid cooling solutions that vent heat outside.Where should I place acoustic panels in a small room?
Treat the first reflection points on side walls and above the workspace. Use a mirror trick or listen for where sound bounces back. Corners benefit from bass traps to control low-end buildup.Is sealing gaps enough to soundproof a closet?
Sealing gaps helps reduce sound leaks but isn’t enough alone. Combine it with mass barriers, insulation, and possibly a door sweep for better results.What’s the best way to manage low frequencies in a tiny space?
Use thick bass traps in corners, tune panels to specific bass frequencies, and consider software EQ. Proper physical treatment can cut low-frequency energy by up to 50% in small rooms.Conclusion
The best way to quiet your workspace isn’t just about adding foam or panels — it’s about smart placement and practical solutions. A rig in another room, with proper ventilation, can be whisper-quiet and safe for your hardware. Treat reflection points and seal gaps for a room that sounds good and stays cool.
Think of your workspace as a tightrope walk: balance is everything. Prioritize moving your rig away, then fine-tune the room with targeted treatment. Your ears and your hardware will thank you.