Pool Maintenance
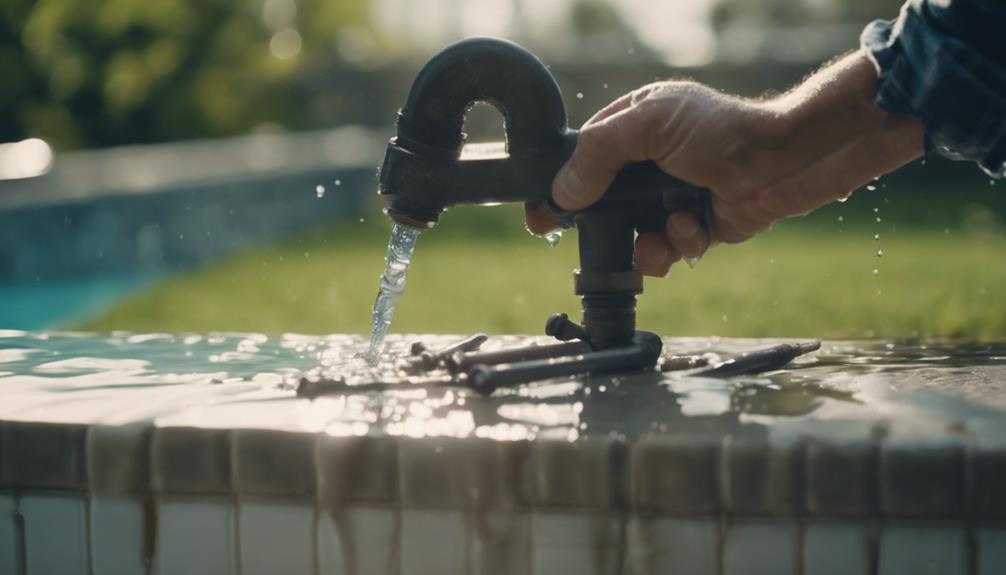
Fixing a Leaking Pool Pipe: What to Do
Pondering over how to tackle a leaking pool pipe?
When encountering a leaking pool pipe, it is important to quickly identify the source. Look for wet spots, air bubbles, or perform a pressure test. For small leaks, you can attempt DIY repairs using pipe fuze techniques. Use Teflon tape or sealant to ensure secure connections. Brass or stainless steel fittings are recommended for long-term durability. If the leak is more complex and DIY methods are not effective, seek professional assistance. Addressing leaks promptly can help prevent water loss, high bills, and structural damage. Always tighten fittings securely, but be careful not to overdo it. Remember, swift identification is key to efficient repairs and saving money.
Key Takeaways
- Conduct a pressure test to locate the leak source accurately.
- Consider DIY repairs for minor leaks; consult a professional for complex issues.
- Use appropriate repair methods like pipe fuze or pipe relining.
- Prevent further damage by maintaining proper water chemistry and inspecting the plumbing regularly.
- Seek professional assistance for underground pipe leaks for effective and lasting repairs.
Identifying the Leak Source
To pinpoint the source of a leaking pool pipe, start by looking for signs of wet spots, water loss, or air bubbles in the pump. These could indicate suction side leaks, which are common culprits for pool plumbing issues.
Another effective method to identify leaks is by conducting a pressure test on the plumbing system. By pressurizing the pipes and observing any drop in pressure, you can narrow down the location of the leak.
Additionally, performing a dye test or using a listening device can help pinpoint the exact spot where the leak is occurring within the pool plumbing.
Professional leak detection services can also be enlisted to accurately locate leaks in underground pipes, providing a precise assessment for effective repair.
Assessing Leak Severity
When determining the severity of a leak in your pool pipe, conduct a pressure test to gauge the extent of the issue. A pressure test involves pressurizing the pipe and observing the pressure drop over a set period. If the pressure loss is 5lbs or less over 30 seconds, the leak may be suitable for repair.
To address the leak, you can use a pipe fuze process. This involves isolating the leaking section, circulating repair materials through the pipe, and creating a permanent patch. Part A is first circulated to fill the crack or hole, followed by Part B to harden and seal the repair.
After completing the repair process, it's crucial to conduct another pressure test to verify the leak has been effectively sealed. By following these steps to assess and repair the leak in your pool pipe, you can prevent further water loss and maintain the integrity of your pool system.
DIY Repair Vs. Professional Help
Consider whether you should attempt a DIY repair or seek professional help when dealing with pool pipe leaks. DIY repair methods, such as using sealants, putty, or patch kits, can be cost-effective for minor leaks but may not provide a permanent solution for more extensive issues.
While DIY repairs can offer a quick fix, they mightn't tackle the root cause of the problem. Professional help, on the other hand, may involve advanced techniques like hydrostatic pressure testing, pipe replacement, or liner replacement for complex leaks.
Hiring a licensed plumber for pool pipe repairs guarantees proper diagnosis and long-lasting solutions. Professional leak detection services can accurately locate and repair pool pipe leaks, preventing further damage to the plumbing system.
When faced with a pool pipe leak, it's essential to weigh the benefits of a temporary DIY repair against the expertise and long-term solutions offered by professional help.
Repairing Damaged Pipe
You can effectively repair a damaged pool pipe by isolating the pipe and conducting a pressure test to evaluate its repair eligibility. Start by using Part A to fill cracks or holes in the pipe, creating a temporary seal. Follow up with Part B to harden the repair, making it a permanent solution.
To guarantee a thorough fix, create a water circuit through the pipe using a plastic bin and pump. This allows the repair materials to circulate, blocking water from escaping and stabilizing pressure in the line post-application.
For underground pool pipe leaks, consider PipeFuze as a long-lasting solution that doesn't require digging or breaking concrete. By following these steps and utilizing the right materials, you can effectively repair a damaged pool pipe and address any leaks efficiently.
Remember to assess the pipe's repair eligibility through a pressure test before proceeding with the repair process.
Replacing Faulty Fittings
To replace faulty fittings in a pool pipe, make sure you select the appropriate size and type of fitting to establish a secure seal. Inspect the fittings for cracks, corrosion, or wear before replacing them to prevent future leaks. When installing new fittings, utilize Teflon tape or pipe thread sealant to ensure a tight and leak-free connection. Consider upgrading to higher quality fittings, such as brass or stainless steel, for increased durability and longevity. Remember to tighten the fittings securely, but avoid over-tightening, as this can damage the fitting or the pipe.
Dos | Don'ts |
---|---|
Select the correct size and type of fitting. | Use fittings that are visibly damaged. |
Inspect fittings for cracks, corrosion, or wear. | Over-tighten fittings, risking damage. |
Use Teflon tape or pipe thread sealant for a tight seal. | Neglect to upgrade to higher quality fittings for longevity. |
Consider brass or stainless steel fittings for durability. | Forget to check for leaks after installation. |
Tighten fittings securely without over-tightening. | Reuse old fittings without proper inspection. |
Fixing Faulty Seals
When addressing faulty seals in your pool pipes, it's crucial to start with a thorough inspection to pinpoint the areas requiring attention. Proper seal replacement involves identifying damaged O-rings, tightening loose connections, or applying the appropriate sealant to guarantee a secure fit.
Seal Inspection Tips
During your routine pool maintenance, be sure to thoroughly inspect the seals for wear or damage to prevent potential leaks in your pool's plumbing system.
Faulty seals are common culprits for water loss in pool pipes. Look out for signs of wear, cracking, or deterioration on the seals, as they can lead to water escaping and cause pressure loss, potentially resulting in damage to the surrounding area.
Regularly inspecting the seals for any visible damage or irregularities is essential to preventing leaks and ensuring the proper functioning of the plumbing system. Well-maintained and intact seals play an important role in preventing water leaks and maintaining the efficiency of your pool's plumbing.
If you notice any issues with the seals, address them promptly to avoid further damage and costly repairs down the line. Proper seal inspection is key to keeping your pool in top condition and preventing water leaks.
Proper Seal Replacement
For effective repair of faulty seals in your pool plumbing system, focus on proper seal replacement techniques to prevent water leaks and maintain system efficiency. Faulty seals are a common culprit behind pool pipe leaks, often resulting from wear, age, or incorrect installation.
When replacing seals, make sure you select the appropriate type and size for your specific application to guarantee a secure fit. Prior to installing the new seal, it's important to thoroughly clean and inspect the sealing surfaces for any damage or debris that could compromise the effectiveness of the replacement.
Opting for high-quality replacement seals can't only fix the current issue but also help prevent future leaks, prolonging the repair's longevity. Following the manufacturer's guidelines and recommendations for seal replacement is essential in maintaining the integrity of your pool plumbing system and avoiding costly water loss.
Proper seal replacement is a key step in addressing leaks and ensuring the efficient operation of your pool.
Addressing Underground Pipe Leaks
Addressing underground pipe leaks in your pool requires prompt detection and appropriate repair methods to prevent further damage. These leaks often occur in the pool pipes located on the pressure side of the system, and they can result from various factors such as weather changes, aging, or physical damage to the pipes.
When dealing with underground pipe leaks, it's important to act swiftly to avoid more extensive harm to your pool's structure.
Repairing underground pipe leaks may involve techniques like pipe relining or complete pipe replacements. It's vital to seek professional help for accurate detection and effective repair of these leaks.
Preventing Further Damage
Regularly inspecting your pool plumbing can help prevent further damage from leaking pool pipes. By staying proactive, you can catch small issues before they escalate into major problems.
Maintaining proper water chemistry in your pool is important as it reduces the risk of corrosion, ultimately extending the lifespan of your pipes. Additionally, avoiding over-pressurizing your plumbing system is essential to prevent stress and potential leaks.
Properly winterizing your pool is another key step in safeguarding the pipes from damage caused by freezing temperatures. By taking these preventive measures, you can greatly reduce the likelihood of leaks and the need for extensive plumbing repairs.
Importance of Prompt Action
Addressing a leaking pool pipe promptly is crucial to prevent further damage to your pool. Ignoring the issue can result in water loss, increased bills, and potential structural problems.
Taking quick action not only saves you money but also helps maintain your pool's water balance and overall safety.
Quick Response Prevents Damage
Responding promptly to a leaking pool pipe is vital in preventing extensive water damage and minimizing repair costs. When a leak occurs in your pool's pipes, especially those connected to the pump, quick action is essential. By addressing the issue promptly, you can prevent water from seeping into the surrounding area and causing structural damage. Delaying repairs can lead to more significant issues, such as mold growth and compromised plumbing system integrity. Immediate intervention is key to preserving the functionality and safety of your pool.
To emphasize the importance of quick response, consider the following factors:
Quick Response Prevents Damage |
---|
Prevents water damage to the surrounding area |
Minimizes the extent of the leak |
Reduces repair costs |
Preserves the integrity of the plumbing system |
Prevents further water loss |
Early Intervention Saves Costs
Taking prompt action when dealing with a leaking pool pipe can greatly reduce repair costs and prevent further damage. If you notice any signs of a leaking pool pipe, such as decreased water pressure, wet spots around the pool pump, or unexplained water loss, it's essential to act swiftly.
By addressing the issue early on, you can avoid potential water loss, structural damage, and even the growth of mold. Timely repairs not only save you money in the long run but also help maintain the integrity of your pool plumbing system.
By detecting and fixing leaks promptly, you can prevent unnecessary water waste and promote the overall health and functionality of your pool. Remember, early intervention is key to saving both time and effort, as well as preserving the longevity of your pool system.
Don't delay – tackle that leaking pool pipe promptly to avoid costly repairs down the line.
Maintenance Tips for Leak Prevention
Regularly inspecting your pool plumbing for signs of wear, corrosion, or damage is crucial for preventing leaks and maintaining a well-functioning system. By staying proactive and following these maintenance tips, you can greatly reduce the risk of leaks in your pool:
Maintenance Tip | Description |
---|---|
Inspect for wear and corrosion | Check pipes, fittings, and seals for any signs of deterioration regularly. Address issues promptly. |
Maintain proper water chemistry | Keep pH levels balanced and avoid extreme chemical imbalances that can corrode pipes and cause leaks. |
Avoid over-pressurizing the system | High pressure can strain pipes, leading to leaks. Ensure the pressure is within safe operating limits. |
Winterize the pool properly | Prevent freeze damage by winterizing your pool correctly to avoid cracks in pipes that could lead to leaks. |
Schedule routine professional checks | Have a professional inspect your pool plumbing regularly to detect and address potential leaks early on. |
Following these maintenance tips will help you keep your pool in top condition and prevent costly leaks.
Frequently Asked Questions
Can You Fix a Leaky Pipe Without Replacing the Pipe?
Yes, you can fix a leaky pipe without replacing it. Innovative solutions like PipeFuze provide a permanent repair for underground pool pipe leaks, particularly those losing 5lbs of pressure or less.
This non-potable plumbing product offers a long-lasting solution without requiring digging or breaking concrete. Homeowners can easily apply PipeFuze's viscous liquid and particulate to fill cracks or holes in pool pipes, creating a durable patch that guarantees effective and lasting results.
How Do You Seal Pool Plumbing?
To secure pool plumbing, make sure the leak area is clean and dry. Apply specialized pool putty or sealant designed for underwater use generously over the leaking spot. Let it dry completely before testing the repair.
Properly sealed pool plumbing prevents water loss and maintains water circulation. It also helps prevent further damage and future leaks. Following these steps can effectively seal your pool plumbing and keep your pool in good condition.
How Do I Know if My Pool Pipe Is Leaking Underground?
To determine if your pool pipe is leaking underground, watch for signs like soggy areas, unexplained water loss, or air bubbles in the pump.
Conduct a pressure test by isolating the suspected pipe and monitoring pressure loss over time to confirm the leak.
Utilize professional leak detection services for precise location of underground leaks.
Addressing these issues promptly can prevent further damage and costly repairs.
How to Fix a Leaking Pipe Underground?
When fixing a leaking pipe underground, you can opt for a specialized repair solution like PipeFuze. It creates a lasting patch by circulating liquid and particulate through the pipe to fill cracks.
By isolating the pipe, testing pressure, and applying Part A and Part B properly, you achieve a permanent fix without excavating.
Following this process effectively addresses underground pool pipe leaks with minimal pressure loss.
What Should I Do If I Suspect My Pool Pipe Is Leaking?
If you suspect your pool pipe is leaking, it’s important to use professional pool leak detection methods to pinpoint the source of the problem. Ignoring a pool leak can lead to further damage and higher water bills. Contact a qualified pool technician to properly diagnose and repair any leaks.
Conclusion
To sum up, fixing a leaking pool pipe requires prompt identification, assessment, and action. Whether you choose to DIY or seek professional help, it's crucial to address the issue promptly to prevent further damage.
Remember, a stitch in time saves nine – taking immediate action can save you time, money, and hassle in the long run.
Keep up with regular maintenance to prevent future leaks and maintain your pool in top condition.
Pool Maintenance
Clear Water: How to Use Flocculant in Your Swimming Pool
Leverage the power of flocculant for your pool to achieve sparkling clarity – find out how in this comprehensive guide.
For optimal use of flocculant in your swimming pool, begin by determining the correct dosage based on your pool size and volume. It is essential to maintain a pH level between 7.4 and 7.6 to achieve the best results. Add the flocculant while the filter is set to ‘Recirculate’ and carefully follow the manufacturer’s instructions. Allow the flocculant to settle overnight, then vacuum the settled particles using the ‘Waste’ setting on the filter. Ensure proper circulation for at least 2 hours after flocculation. By following these steps diligently, you will attain crystal clear water in your pool.
Key Takeaways
- Determine correct flocculant dosage based on pool size and water volume.
- Maintain pH between 7.4-7.6 and add flocculant on 'Recirculate' filter setting.
- Allow flocculant to settle for 8-24 hours before vacuuming on 'Waste' setting.
- Regular use of flocculant per manufacturer's instructions ensures crystal clear water.
- Vacuum slowly post-settling to remove particles and maintain pool water balance.
Benefits of Using Flocculant
Why should you consider using flocculant in your swimming pool?
Flocculant is a powerful tool in maintaining crystal clear pool water. By adding flocculant to your pool, you allow it to work its magic by causing small particles in the water to clump together. These clumps of particles become heavy enough to sink to the bottom of the pool, resulting in improved water clarity.
Not only does this process clear out cloudy pool water quickly, but it also reduces the need for frequent filter cleaning. This means less time spent on pool maintenance and more time enjoying your pool.
Additionally, using flocculant is a cost-effective solution that can save you money in the long run. So, if you want to enhance the clarity of your pool water, simplify your pool maintenance routine, and save on filter cleaning, incorporating flocculant into your pool care regimen is a smart choice.
Determining the Correct Dosage
To guarantee proper use of flocculant in your swimming pool, ascertain the correct dosage based on factors such as pool size and water volume.
The best results for clear water depend on using the right amount of pool flocculant. Manufacturer instructions offer specific guidelines on the appropriate dosage tailored to your pool's needs.
Overuse of the flocculant can lead to water quality issues, while underuse may result in ineffective cleaning. It's essential to conduct research and understand the proper dosage for your specific pool to ensure clear and clean water.
Adding Flocculant to Pool Water
When adding flocculant to your pool water, it's essential to maintain a balanced pH level between 7.4 and 7.6 to guarantee peak effectiveness.
Remember to add the flocculant while the pool filter is set to 'Recirculate' to prevent clogging issues.
Additionally, the correct amount of flocculant should be added based on your pool's volume to achieve the desired results effectively.
Benefits of Flocculant
Using flocculant in your swimming pool enhances water clarity and cleanliness by effectively binding together tiny particles for easy removal. By adding flocculant to your pool water, you can experience a range of benefits:
- Improved Filtration: Flocculant works by clumping together small particles, allowing your pool filter to trap them more efficiently, resulting in cleaner water.
- Quicker Water Clarification: Cloudy or murky water can be quickly cleared up with the use of flocculant, saving you time and effort in maintaining your pool.
- Enhanced Removal of Impurities: Flocculant is effective in capturing algae, dirt, and other impurities that may not be caught by regular pool filters, ensuring a thorough cleaning process.
These benefits not only contribute to better water clarity but also enhance overall pool hygiene, providing you with a more enjoyable and invigorating swimming experience.
Flocculant is a convenient and efficient solution for achieving crystal clear pool water in a short amount of time.
Application Process Explained
Enhance the clarity and cleanliness of your swimming pool by following the simple application process for adding flocculant to your pool water. Start by adding the recommended amount of flocculant according to the manufacturer's instructions. Turn your pool filter to the 'Recirculate' setting to allow the flocculant to circulate for a minimum of 2 hours, effectively clumping particles together. Once the circulation period is complete, switch the filter setting to 'Waste' and manually vacuum the settled particles from the pool. If necessary, repeat the process until your pool water achieves crystal clear clarity.
Application Process Steps | Details |
---|---|
1. Add Flocculant | Follow manufacturer's instructions |
2. Circulate | Set filter to 'Recirculate' for 2 hours |
3. Vacuum | Switch filter to 'Waste' and manually vacuum |
4. Repeat if needed | For crystal clear water |
Maintenance Tips After Flocculation
To maintain the clarity and cleanliness of your pool water after adding flocculant, guarantee proper circulation for at least 2 hours.
Once the circulation period is complete, turn off the pump and let the flocculant settle at the bottom of the pool overnight.
The following day, utilize the Waste setting on your filter to carefully vacuum the settled particles from the pool floor.
Remember to top up the pool water level post-vacuuming to maintain proper water balance.
Additionally, make sure you balance the water chemistry after using flocculant to uphold crystal clear and healthy pool water.
Proper maintenance post-flocculation is essential for the effectiveness of the treatment and the overall well-being of your pool.
Allowing Flocculant to Settle
When allowing flocculant to settle in your pool, remember that the timing of this process is vital to achieve clear water. Waiting for about 8 to 24 hours allows the flocculant to bind particles effectively.
During this time, the treated particles will gradually sink to the pool's bottom, preparing them for efficient removal.
Settling Process Timing
For best results, allow the flocculant to settle in your swimming pool for a recommended period of at least 8-12 hours. The settling process is vital for the particles to clump together and sink to the bottom of the pool, resulting in clearer water.
Here are some key points to keep in mind during the settling process:
- Time Matters: Settling time may vary based on the amount of flocculant used and the current pool conditions. It's advisable to follow the manufacturer's guidelines for the best results.
- Overnight Settling: Allowing the flocculant to settle overnight is often recommended to ensure maximum effectiveness. Patience during this time is crucial to achieving crystal clear water.
- Avoid Disturbance: It's important not to disturb the settled particles while they're in the process of sinking to the bottom. Any disruption could impede the effectiveness of the flocculant, making it more challenging to achieve the desired outcome.
Clear Water Results
As the flocculant settles in your pool water, small particles begin to clump together for easier removal. It's essential to let the flocculant work overnight or for a minimum of 8 hours to achieve best results.
During this time, the settled particles will form a visible layer at the bottom of your pool, indicating the effectiveness of the flocculant. Patience is key in this process; the longer you allow the flocculant to work, the clearer your pool water will become.
Once the flocculant has settled the particles, you can proceed with manual vacuuming to effectively remove the debris from your pool. This combination of settling the particles with flocculant and manual vacuuming is vital for maintaining clear water in your pool.
Vacuuming the Pool
To effectively remove settled particles in your swimming pool after adding flocculant, vacuum the pool using slow and steady motions. This step is essential for pool maintenance to guarantee a clear and clean pool.
Here are some key tips to keep in mind:
- Use the 'Waste' Setting: When vacuuming after adding flocculant, make sure to use the 'Waste' setting on your filter. This setting allows you to vacuum out the waste water along with the particles, keeping your pool clean.
- Slow and Steady Vacuuming: Avoid stirring up settled debris by vacuuming slowly and steadily. This method helps to effectively remove settled particles without causing them to disperse back into the water.
- Top Up Pool Water: After vacuuming the pool, remember to top up the water to maintain proper levels. This simple step helps to ensure that your pool functions optimally and stays crystal clear.
Vacuuming the pool after using flocculant is a vital part of pool maintenance, contributing to a sparkling swimming experience.
Regular Use for Pristine Water
Consistently using flocculant in your swimming pool is key to maintaining pristine water quality. Adding this chemical once or twice a week plays a vital role in keeping your pool water clear and clean.
To guarantee best results, always follow the manufacturer's instructions for flocculant dosage.
By using flocculant regularly, you help in capturing small particles that may cloud the water, thereby maintaining crystal clear water in your pool.
Incorporating flocculant into your routine pool maintenance can effectively prevent issues like cloudy water and algae buildup.
Remember, the key to enjoying a sparkling pool lies in the regular use of flocculant as part of your maintenance regimen.
Stay proactive in caring for your pool, and you'll consistently enjoy the benefits of pristine, inviting water for all your swimming and leisure activities.
Frequently Asked Questions
How to Use Flocculant in a Swimming Pool?
To use flocculant in a swimming pool, follow these steps:
- Add the recommended amount based on your pool's volume.
- Let the pool pump run for at least 2 hours to distribute the flocculant evenly.
After 8 hours, vacuum the pool to remove settled particles at the bottom.
For better results, consider adding flocculant in the evening for overnight settling.
Don't forget to top up the pool water after vacuuming to maintain the proper water level.
How Much Liquid Flocculant Do I Put in My Pool?
You should consider the size of your pool and the manufacturer's guidelines when determining the amount of liquid flocculant to add.
A general rule of thumb is using around 8 ounces to 1 quart of liquid flocculant per 10,000 gallons of water.
Following the recommended dosage is essential to prevent issues like water clarity problems.
Over-treating or under-treating can lead to ineffective results, so make sure you measure accurately for best pool water clearing.
Can You Add Flocculant and Chlorine at the Same Time?
You shouldn't add flocculant and chlorine at the same time. It's generally recommended to add them separately due to potential chemical reactions.
Chlorine is essential for sanitizing the pool, while flocculant is used to clarify cloudy water. Adding them individually allows each chemical to effectively perform its specific function.
Start by adding chlorine first to sanitize the water, then follow with flocculant to clear particles, ensuring best results for your pool maintenance.
Will Floc Clear a Green Pool?
Yes, floc can effectively clear a green pool by clumping together algae particles for easier removal. It accelerates the process compared to traditional methods, making it an ideal solution for severe algae blooms causing green water.
Proper dosage and application of floc are essential for successful results. Remember to vacuum the settled particles post-treatment to achieve a clear and inviting swimming pool.
What Are the Benefits of Using Flocculant in a Swimming Pool?
Using flocculant in pool can help in clarifying the water by causing tiny particles to clump together, making it easier for the filter to remove them. This can result in a cleaner and clearer pool, reducing the need for excessive chlorine and improving overall water quality.
Conclusion
To sum up, using flocculant in your swimming pool can effectively clarify cloudy water by removing small particles and debris. By following the correct dosage, allowing the flocculant to settle, and then vacuuming the pool, you can maintain clear and pristine water for a more enjoyable swimming experience.
Regular use of flocculant will help keep your pool water crystal clear, ensuring a clean and inviting environment for you and your guests.
Pool Maintenance
Using Flocculant in Your Pool: A Guide
Master the art of achieving crystal-clear pool water with the transformative power of flocculant – your key to a visually stunning swimming experience.
By adding flocculant to your pool, you can greatly improve water clarity and filtration efficiency. This helps create a cleaner and more visually appealing swimming environment. Flocculant works by clumping particles together, causing them to sink to the bottom for easier removal. To use it effectively, make sure to use the correct dosage, avoid disrupting settled particles, and keep the pool pump running for optimal circulation. Quickly address common issues like incomplete particle removal or imbalanced chemistry. Following precise application tips and manufacturer instructions is essential for keeping your pool clear. Thoroughly vacuuming the pool after treatment is crucial for achieving crystal-clear water. Learn more about the benefits and specifics of using flocculant in your pool.
Key Takeaways
- Properly balance pH levels before applying flocculant.
- Allow flocculant to circulate for at least 2 hours.
- Vacuum pool thoroughly after particles settle.
- Follow manufacturer instructions precisely for best results.
- Dispose of excess flocculant properly to avoid environmental harm.
What Is Pool Flocculant?
Pool flocculant, whether inorganic or organic, plays an important role in maintaining the cleanliness and clarity of your pool water. When it comes to treating pool water, pool flocculant is essential for dealing with small particles that can make your pool water appear cloudy or murky.
Inorganic flocculants, such as aluminum sulfate, and organic flocculants, like polymers, are the two main types used for this purpose. Organic flocculants are generally more effective in water treatment compared to inorganic ones.
The function of pool flocculant is to create a floc blanket in the water, which binds with these small particles. This binding process causes the particles to clump together and eventually sink to the pool bottom. This process, known as coagulation, not only improves water clarity but also enhances filtration efficiency by making it easier to remove these particles during the filtration process.
Benefits of Using Flocculant
Using flocculant in your pool offers multiple benefits. It helps to quickly clear up cloudy water, enhancing water clarity and aesthetics.
Additionally, flocculant efficiently removes small particles, improving filtration efficiency and reducing the strain on your pool filter.
Clearer Water Quickly
Achieve clearer water quickly by leveraging the benefits of using flocculant in your pool. When dealing with cloudy pool water, flocculant is a game-changer.
Here's how it works:
- Invigorating Clumping: Flocculant causes tiny particles in the water to clump together, making them easier to eliminate.
- Efficient Filtration: By binding these clumped particles, flocculant helps them sink to the pool bottom, reducing the strain on your filter.
- Cost-Effective Solution: Not only does flocculant enhance water clarity, but it also offers a budget-friendly approach to maintaining your pool.
- Enhanced Aesthetics: Embrace the joy of swimming in a clear pool by utilizing flocculant for quick and effective results. Enjoy a sparkling pool that invites you to take a rejuvenating dip without delay.
Removes Small Particles
Enhance water clarity efficiently by utilizing flocculant to remove small particles like dirt, debris, algae, and bacteria from your pool. When you use flocculant, it works by binding these tiny particles together, forming larger clumps that are easier to filter out. This process, known as coagulation, enhances the filtration system's effectiveness, leading to a cleaner pool with improved clarity.
To illustrate the benefits of using flocculant in your pool for removing small particles, consider the following comparison table:
Without Flocculant | With Flocculant |
---|---|
Small particles remain suspended in the water. | Small particles clump together for easier filtration. |
Filtration system struggles to trap all particles. | Filtration system captures larger particle clumps effectively. |
Water clarity may be compromised due to lingering particles. | Water clarity improves as particles are removed efficiently. |
More frequent need for chemical treatments to combat algae and bacteria. | Reduced need for excess chemical usage and potential elimination of algaecides. |
Enhances Filtration Efficiency
By utilizing flocculant in your pool, you can boost filtration efficiency by aggregating small particles for easier removal. This process enhances water clarity by capturing and settling suspended debris, ultimately reducing strain on the pool filter system and extending its lifespan.
Additionally, the use of flocculant can noticeably reduce the amount of chemicals required to maintain water quality, promoting a more sustainable and cost-effective approach to pool maintenance.
Here are four key benefits of using flocculant in your pool:
- Improved Filtration Efficiency: Flocculant aids in aggregating small particles, making it easier for the filter to capture and remove them.
- Enhanced Water Clarity: By effectively removing suspended debris, flocculant contributes to clearer and cleaner pool water.
- Extended Lifespan of Pool Filter System: Reduced strain on the filter system leads to a longer-lasting and more efficient filtration system.
- Chemical Reduction: Using flocculant can decrease the reliance on additional chemicals, promoting a more balanced and eco-friendly pool maintenance routine.
When to Use Flocculant
Use flocculant in your pool when you notice extremely cloudy water or visible particles that won't filter out. Flocculant is particularly useful after heavy rain, during algae growth, or when debris causes the water to appear murky. If your regular pool filtration system is struggling to clear the water, it might be time to contemplate using flocculant. However, make sure that the water temperature is above 60°F for the flocculant to work effectively.
It's important to bear in mind that flocculant isn't a solution for routine pool maintenance but a targeted treatment for specific issues with your pool water. By promoting coagulation of particles, flocculant helps them settle to the bottom, making it easier to remove them through vacuuming or filtration.
How Does Flocculant Work?
Flocculant works by causing small particles in your pool water to clump together, making them heavier and sink to the bottom of the pool. Here's how it achieves this:
- Clumping Together:
Flocculant initiates a process called coagulation, where it binds to smaller particles, facilitating the formation of larger and heavier clumps.
- Sink to the Bottom:
The heavier particles created by the clumping process gradually sink to the bottom of the pool, where they can be easily vacuumed or filtered out.
- Improve Water Clarity:
By removing suspended debris and contaminants, flocculant helps in enhancing the overall clarity of the pool water.
- Enhance Filtration Efficiency:
The removal of these particles not only improves water clarity but also boosts the efficiency of the pool's filtration system, reducing the need for excessive chemical treatments.
Understanding how flocculant works can help you effectively maintain your pool and ensure crystal clear water for an invigorating swim.
Proper Usage of Flocculant
When using flocculant in your pool, it's important to add the correct amount according to your pool size and contamination levels.
Remember to pour the flocculant into the deepest part of the pool while the pump is running to guarantee even distribution.
Avoid the mistake of placing the flocculant directly into the skimmer basket or filter to prevent potential clogging issues.
Dos and Don'ts
Make sure to dilute the flocculant as per the manufacturer's instructions before adding it to your pool for best results.
When using flocculant in your pool, follow these dos and don'ts:
- Do test and balance the pool water pH levels before and after using flocculant for peak effectiveness.
- Avoid disturbing settled particles at the bottom of the pool while vacuuming to prevent clouding the water again.
- Run the pool pump for at least 2 hours after adding flocculant to ensure proper circulation.
- Avoid adding flocculant directly to the skimmer basket or filter; always add it to the deepest part of the pool with the pump running.
Application Tips
After understanding the dos and don'ts of using flocculant in your pool, guarantee proper application by diluting the product as instructed by the manufacturer for best results.
Essential dilution is vital to ensure the effectiveness of the flocculant. Add the flocculant slowly to the pool while the pump is running. This allows for even distribution of the product throughout the water.
Let the flocculant circulate in the pool for a minimum of 2 hours. This time allows the flocculant to clump together the particles in the water. Once the particles have settled to the bottom, vacuum the pool thoroughly. This step is crucial to achieve crystal clear water.
Remember to balance the pH levels of the pool both before and after using the flocculant. By following these application tips and manufacturer instructions precisely, you can enjoy a clean and clear pool for your relaxation and enjoyment.
Common Issues With Flocculant
If you frequently notice cloudy water in your pool after using flocculant, you may be experiencing common issues with the treatment. Here are some common problems you might encounter:
- Incomplete Removal: Flocculant may not effectively remove all algae and debris, leading to persistent cloudiness.
- Unbalanced Chemistry: Incorrect chemical levels can interfere with the flocculant's performance, causing cloudy water.
- Improper Application: Using too much or too little flocculant can result in re-clouding or ineffective clumping of particles.
- Robotic Cleaners and Inadequate Vacuuming: Robotic cleaners may disturb settled particles, while insufficient vacuuming can leave lingering debris, both contributing to cloudy water.
If you face these issues, consider troubleshooting steps like retesting water chemistry, adjusting pH levels, and ensuring proper filtration and vacuuming techniques are applied. By addressing these common problems, you can enjoy a clear and inviting pool.
Removing Excess Flocculant
Experiencing an excess of flocculant in your pool can be remedied by effectively removing it using a pool vacuum on the Waste setting.
When vacuuming, focus on removing the particle clumps that have settled at the bottom of the pool. Slowly vacuum the pool to prevent stirring up settled debris, guaranteeing the efficient removal of excess flocculant.
After vacuuming, remember to top up the water level to maintain the proper balance. The particles, coagulated together by the flocculant in a process known as coagulation, can be efficiently eliminated by this method.
Dispose of the waste water following local regulations to avoid environmental harm. To monitor the water clarity post-flocculant removal, use a test kit to make sure the pool is balanced.
Keep an eye on the water clarity and balance, as well as regularly check the DE filters and the filter multiport to maintain excellent pool conditions.
Comparison: Flocculant Vs. Clarifier
Comparing flocculant and clarifier reveals distinct differences in their mechanisms for improving water clarity in pools.
- Flocculant: This product works by clumping particles together, making them heavier to sink to the pool bottom. It requires vacuuming the settled particles for removal.
- Clarifier: Unlike flocculant, clarifier catches particles in the pool filter by coagulating them into larger masses that can be easily trapped.
- Filter Maintenance: When using flocculant, the pool filter is typically set to 'Recirculate' to avoid clogging, while clarifier aids in preparing particles for filter capture.
- Speed of Action: Flocculant acts faster than clarifier, usually within hours, providing quick and efficient results through the manual removal of clumped particles.
Understanding these distinctions can help you choose the right product based on your pool's needs, whether you prefer quick results with flocculant or a filter-dependent approach with clarifier.
Frequently Asked Questions
Can You Add Flocculant Directly to a Pool?
Yes, you can add flocculant directly to a pool, but it's important to do so correctly. Avoid pouring it into the skimmer basket or filter to prevent damage and clogging.
Instead, add flocculant to the deepest part of the pool with the pump running for even distribution. Following manufacturer instructions on how to add flocculant is essential for best results and to prevent filter issues.
Proper distribution helps the flocculant clump particles effectively for removal.
When Should I Use Flocculant in the Pool?
When dealing with extremely cloudy water caused by small particles in your pool, consider using flocculant. It's effective after heavy rain, algae blooms, or high debris levels from pool parties.
Flocculant isn't for regular maintenance but specifically targets water clarity issues when filtration alone isn't enough. It helps clear water effectively by clumping together tiny particles that are too small for the filter to catch.
Use it for quick results before special events or when needed.
Can You Run Flocculant Through Filter?
You shouldn't run flocculant through the filter in your pool. Doing so can lead to clogging and decrease the filter's efficiency.
For best results, add flocculant directly to the pool water and let it circulate before settling.
Always add flocculant to the deepest part of the pool with the pump set to 'Recirculate.'
The main purpose of flocculant is to clump small particles for easier removal, not to pass through the filter, avoiding potential damage.
How Much Floc Do I Need for a 10000 Gallon Pool?
For a 10000 gallon pool, you typically need around 8 ounces (1/2 pound) of flocculant. The amount required may vary based on the product's brand and concentration. It's important to adhere to the manufacturer's guidelines for accurate dosing.
Adjust the flocculant amount based on the water's cloudiness or particle level. After adding the flocculant, running the filter for 24 hours aids in efficient particle removal.
Can TCCA 90 be used as an alternative to flocculant in pool maintenance?
When it comes to pool maintenance, using tcca 90 in pool chemistry is a common practice. While TCCA 90 is a powerful disinfectant that can keep your pool water clean and sanitized, it cannot completely replace a flocculant. Flocculants are still necessary for removing small particles and clarifying the water, so it’s important to use both for optimal pool maintenance.
Conclusion
To guarantee, using flocculant in your pool can help clarify water by clumping together fine particles for easier removal.
One interesting statistic to take into account is that a properly maintained pool can save up to 50% on water and chemical costs compared to a neglected pool.
By understanding how flocculant works and when to use it, you can ensure your pool stays clean and clear all season long.
Pool Maintenance
Saltwater Pool Maintenance: How to Care for a Saltwater Swimming Pool
Optimize your saltwater pool maintenance routine with expert tips to ensure crystal-clear water and a refreshing swim every time.
To properly maintain a saltwater swimming pool, it is important to use 99% pure pool-grade salt and keep salinity levels between 2,700-3,400 PPM. Running the pool pump for a minimum of 8 hours each day is essential for proper circulation, which helps prevent debris buildup, algae growth, and ensures an even distribution of salt and chlorine. Balancing pH levels is crucial to prevent calcium buildup, and regular cleaning of the salt cell is necessary to maintain chlorine production. Monitoring pH levels (7.2-7.6) and free chlorine levels (1-3 ppm) is important for a safe swimming environment. Additionally, shocking the pool weekly and conducting regular cleaning and water quality testing are necessary to prevent any issues. By following these steps consistently, you can ensure the best maintenance for your pool.
Key Takeaways
- Use pool-grade salt with at least 99% purity to maintain salinity levels.
- Ensure proper water circulation by running the pump and filter for 8 hours daily.
- Prevent calcium buildup by maintaining pH levels and testing calcium hardness.
- Regularly clean the salt cell every 3 months to avoid water quality issues.
- Maintain balanced pH and chlorine levels through weekly testing and adjustments.
Proper Salt Addition
To properly maintain your saltwater pool, make sure you use pool-grade salt that's at least 99% pure when adding salt to the water. Maintaining the correct salt levels is essential for the best performance of your pool, with the recommended salinity level falling between 2,700 to 3,400 parts per million (PPM).
When adding salt, guarantee proper distribution by turning on the pool filter system to circulate the salt for 24 hours. This step is important to achieve thorough mixing and prevent localized high concentrations of salt.
To accurately monitor the salt levels, use a digital salinity tester to check various areas of the pool, ensuring uniformity. Regularly testing and adjusting salt levels around the pool is crucial to maintain water quality and prevent any potential issues that may arise from inconsistent salinity levels.
Maintaining Water Circulation
For peak water quality and pool cleanliness, make sure you run the pool pump and filter for a minimum of 8 hours daily to maintain proper circulation in your saltwater pool.
Adequate water circulation is vital for evenly distributing salt and chlorine throughout the pool, which is essential for effective sanitation. By ensuring proper water circulation, you can prevent the buildup of dirt and debris, thereby contributing to the overall cleanliness of your pool.
Additionally, consistent circulation helps maintain balanced water chemistry by evenly dispersing chemicals, creating a safe swimming environment for you and your family.
Stagnant areas in the pool are minimized through continuous water circulation, reducing the risk of algae growth and other water quality issues.
Preventing Calcium Buildup
Maintain proper pH levels to prevent calcium buildup around your pool and avoid scaling and corrosion.
Calcium buildup occurs when the water becomes oversaturated with calcium, leading to the formation of scaling on pool surfaces. To prevent this, it's important to monitor and regulate the pH levels in your pool regularly.
Imbalanced pH levels can contribute to the precipitation of calcium, resulting in unsightly deposits that are challenging to remove. Additionally, maintaining proper water chemistry is vital in preventing calcium buildup.
By routinely testing and adjusting the calcium hardness levels in your pool, you can avoid excessive accumulation of calcium that can lead to scaling issues. Using a calcium remover or a mild acid solution can help dissolve existing calcium deposits and prevent new buildup.
Checking Salt Cell Cleanliness
When it comes to maintaining your saltwater pool, checking the cleanliness of your salt cell is essential. Regularly inspecting the salt cell every 3 months can help prevent scale buildup and guarantee efficient chlorine generation.
Use a high-pressure hose or consider a mild acid wash to clean out any deposits that may hinder its performance.
Salt Cell Inspection
Regularly inspecting the salt cell every 3 months for calcium buildup or scale deposits is essential for maintaining the efficiency of your salt chlorinator system. When you inspect the salt cell, keep an eye out for any signs of white deposits or flakey spots on the surface. These can indicate the presence of calcium buildup or scale deposits, which can hinder the proper functioning of your salt chlorinator. By catching these issues early through regular inspections, you can guarantee that your salt cell continues to operate effectively.
Inspecting the salt cell is a simple yet important step in your pool maintenance routine. If you notice any buildup or deposits, you can then proceed to clean the salt cell using a high-pressure hose or a mild acid solution. Following the manufacturer's instructions for cleaning is crucial to prevent damage to the salt cell.
Cleaning Process
Check the cleanliness of your salt cell regularly to guarantee maximum chlorine production and prevent maintenance issues. Scale buildup on the salt cell can impede chlorine production, leading to water quality problems.
Inspect the salt cell every three months for any deposits or scaling. If you notice buildup, use a high-pressure hose or a mild acid solution to clean the cell thoroughly.
Proper maintenance of the salt cell is essential for efficient chlorine production and to extend the life of the cell. Neglecting to clean the salt cell can result in decreased chlorine levels, potentially causing algae growth or other water quality issues.
Following the manufacturer's guidelines for cleaning the salt cell is vital to ensure safe and effective maintenance. Remember to wear appropriate protective gear, such as gloves and goggles, when handling chemicals during the cleaning process.
Balancing Ph and Chlorine Levels
Maintaining the appropriate pH levels between 7.2-7.6 is essential to prevent skin and eye irritation in your saltwater pool.
Monitoring free chlorine levels at 1-3 ppm is vital for effective sanitation and algae prevention.
Properly balancing your pool's chemistry by adjusting chlorine and pH levels through regular testing ensures a safe and comfortable swimming environment for you and your guests.
Ph Level Importance
Properly balancing the pH and chlorine levels in your saltwater pool is essential for maintaining water clarity and sanitation. pH balance, ranging from 7.2 to 7.6, is vital for the effectiveness of free chlorine levels in your pool.
When pH levels are imbalanced, it can lead to poor chlorine performance, potentially causing algae growth and jeopardizing water quality. Regularly testing and adjusting pH levels is key to ensuring that your pool remains clean and safe for swimming.
High pH levels can reduce chlorine's effectiveness, requiring more chemicals and increasing maintenance costs. By monitoring and maintaining the correct pH levels in your saltwater pool, you not only promote efficient chlorine function but also guarantee a safe and enjoyable swimming experience for everyone.
Chlorine Level Monitoring
To maintain ideal sanitation and water quality in your saltwater pool, consistent monitoring of chlorine levels is essential for guaranteeing a safe and enjoyable swimming environment. Keeping the chlorine levels within the recommended range of 1-3 parts per million (ppm) is critical to effectively sanitize the pool water.
Additionally, balancing pH levels between 7.2-7.6 is essential to prevent skin and eye irritation and to ensure the effectiveness of chlorine in keeping your pool clean. Remember to adjust the chlorine output as needed based on regular test results to maintain a healthy swimming environment.
Properly balanced pH and chlorine levels are the key to a pleasant and safe swimming experience in your saltwater pool.
- Regularly test and monitor chlorine levels.
- Maintain chlorine levels between 1-3 ppm.
- Balance pH levels between 7.2-7.6.
- Adjust chlorine output based on test results.
- Ensure proper pH and chlorine levels for a healthy swimming experience.
Balancing Pool Chemistry
Regularly testing and adjusting pH and chlorine levels in your saltwater pool is essential for maintaining water balance and sanitation. pH levels should be tested weekly, aiming for a range of 7.2-7.6 to maintain proper water balance.
Monitoring and adjusting free chlorine levels between 1-3 ppm is important for effective sanitation. Utilize baking soda to raise pH levels and sodium carbonate or muriatic acid to lower them as needed.
Maintaining appropriate chlorine levels not only prevents algae growth but also ensures the safety of the water. Balancing pH and chlorine levels is crucial to prevent equipment corrosion and maintain high water quality standards.
Weekly Pool Shocking
To maintain your saltwater pool effectively, make sure to shock it weekly with a high dose of chlorine to eliminate bacteria, algae, and contaminants. This weekly shocking routine is essential for maintaining water clarity and sanitation in your saltwater pool.
Factors such as heavy pool use, high temperatures, and rainfall can increase the need for weekly shocking to keep the water clean and safe for swimming. When selecting a shock treatment, opt for a non-chlorine shock specifically designed for saltwater pools to prevent damage to the system.
Regular pool shocking not only kills bacteria and algae but also helps prevent common issues like cloudy water, algae growth, and unpleasant odors. By incorporating weekly shocking into your pool maintenance routine, you can ensure that your saltwater pool remains an invigorating and enjoyable oasis for you and your family to relax and swim in.
Skimming, Brushing, Vacuuming
Maintaining a clean and clear saltwater pool involves daily skimming to remove debris and prevent buildup in the water. By skimming the pool surface regularly, you can prevent leaves, bugs, and other debris from sinking to the bottom and causing water quality issues.
Additionally, brushing the pool walls and floor on a weekly basis is important to prevent algae growth and maintain overall cleanliness. Algae can quickly spread in neglected areas, leading to cloudy and uninviting water.
Moreover, vacuuming the pool at least once a week is essential to remove dirt, leaves, and other debris that may have settled on the bottom. These routine maintenance tasks, including skimming, brushing, and vacuuming, play a significant role in keeping your saltwater pool crystal clear and reducing the need for excessive chemical treatments.
Regular Water Quality Testing
Guarantee proper sanitation and safety for swimmers by testing the free chlorine levels weekly in your saltwater pool.
Monitoring pH levels is also vital, especially considering the naturally high pH in saltwater systems. To maintain ideal water quality and prevent issues, it's vital to balance both pH and chlorine levels.
Additionally, testing alkalinity, stabilizer, and calcium levels monthly is key to ensuring a well-balanced pool environment. Aim to keep alkalinity levels between 100 and 150 parts per million (PPM) for the best pool water chemistry.
- Test chlorine levels weekly: Ensures safe swimming conditions.
- Monitor pH levels regularly: Prevents imbalances that can lead to skin and eye irritation.
- Balance pH and chlorine levels: Maintains water quality and prevents algae growth.
- Test alkalinity, stabilizer, and calcium levels monthly: Ensures a well-balanced pool chemistry.
- Maintain alkalinity between 100 and 150 PPM: Best for pool water chemistry.
Troubleshooting Common Issues
Troubleshoot common issues in your saltwater pool by identifying and addressing factors contributing to cloudy water, algae growth, and corrosion. Cloudy water often indicates a chlorine deficiency or a poorly functioning filtration system. To combat algae growth, ensure proper chlorine levels are maintained and run the pool pump regularly. Corrosion problems can arise from high salt levels, requiring diligent monitoring and dilution of concentrations. Regularly testing pH, alkalinity, and salt levels is crucial in troubleshooting and preventing common saltwater pool issues. By staying on top of maintenance tasks and testing water quality consistently, you can detect and address water quality problems early, ensuring a safe swimming environment for you and your family.
—
Common Issue | Causes | Solutions |
---|---|---|
Cloudy Water | Chlorine deficiency, poor filtration | Test and adjust chlorine levels, check filtration system |
Algae Growth | Insufficient chlorine, lack of regular pump operation | Maintain proper chlorine levels, run pump regularly |
Corrosion Issues | High salt levels | Monitor, dilute salt concentrations as needed |
Converting to Saltwater Pool
To successfully convert your traditional pool into a saltwater pool, start by purchasing a saltwater chlorinator system designed for your specific pool size and requirements.
Ensure a smooth changeover by following these steps:
- Drain and Clean: Prepare your pool by draining and cleaning it thoroughly before installing the saltwater system to guarantee peak performance.
- Add Salt: Follow manufacturer instructions and add the correct amount of pool-grade salt based on your pool's size to achieve the desired salinity.
- Test pH Levels: Regularly test and adjust pH levels after the conversion to maintain proper water balance and comfort for swimmers.
- Secure Connections: Before activating the saltwater system, verify that all connections are secure to prevent potential leaks or malfunctions that could impact the conversion process.
- Maintenance: Stay proactive with regular upkeep and monitoring to keep your saltwater pool in top-notch condition for long-term enjoyment.
Frequently Asked Questions
What Is Routine Maintenance for a Salt Water Pool?
Routine maintenance for a saltwater pool involves weekly tasks such as pH level testing and adjustment, and regular monitoring and adjustment of free chlorine levels for sanitation.
Maintaining the correct salinity level of 2,700 to 3,400 PPM is essential for pool health. Cleaning and inspecting the salt cell every 3 months ensures ideal chlorine generation.
Additionally, weekly tasks like skimming, brushing, and vacuuming help keep the water clear and free of debris.
Is It Difficult to Maintain a Saltwater Pool?
Maintaining a saltwater pool is generally easier than a traditional chlorinated pool due to the self-regulating nature of salt chlorination systems. The process requires less monitoring and adjustment of chlorine levels, reducing maintenance efforts.
While initial setup costs may be higher, long-term maintenance expenses are often lower. Regular testing of salt levels and water chemistry, along with cleaning the salt chlorinator cell, are key tasks for proper upkeep.
Soft, gentle water and reduced skin and eye irritation are benefits of well-maintained saltwater pools.
Do You Need to Add Chemicals to a Saltwater Pool?
Yes, you need to add chemicals to a saltwater pool.
Despite the misconception that saltwater pools are maintenance-free, you still require regular monitoring and adjustment of pH, alkalinity, stabilizer levels, and occasional additions of muriatic acid, shock treatment, or algaecides.
Testing for free chlorine and salt levels is vital for water quality.
While saltwater pools generate chlorine, supplemental chemicals are essential for balance and safe swimming conditions.
How Often Should I Add Salt to a Salt Water Pool?
You should add salt to your saltwater pool when levels fall below the recommended range of 2,700 to 3,400 parts per million (PPM).
Factors like heavy rain, splash out, or dilution from adding fresh water can lower salt levels. Use a digital salinity tester to measure salt levels accurately in various pool areas.
Adding salt after rain or water addition helps maintain ideal salinity for efficient chlorine generation. Remember to turn off the chlorine generator while adding salt for proper distribution and functionality.
What Changes in Saltwater Pool Maintenance are Needed During the Rainy Season?
During the rainy season, pool maintenance becomes even more important to prevent algae and bacteria buildup. To keep your saltwater pool in top condition, consider these rainy season pool maintenance tips. Regularly check and adjust the pH levels, ensure proper filtration, and use algaecide as a preventive measure.
Conclusion
In summary, maintaining a saltwater pool doesn't have to be a challenging task. By following the proper care and maintenance steps outlined in this article, you can guarantee your pool stays clean, safe, and enjoyable for all swimmers.
Remember, a little effort goes a long way in keeping your saltwater pool in top condition. So don't let misinformation deter you – with the right knowledge and approach, you can easily care for your saltwater swimming pool like a pro.
-
Health Benefits4 weeks ago
Does Swimming Pool Water Damage Teeth?
-
Vetted4 weeks ago
15 Best Robot Vacuums for Pools to Keep Your Pool Sparkling Clean
-
Relaxation4 weeks ago
Create a Relaxing Oasis: Top Poolside Lounging Ideas
-
Aesthetic and Design4 weeks ago
Stunning Texas Pool Ideas to Upgrade Your Backyard Oasis
-
Swimming Pools3 weeks ago
Prolong Pool Pleasure: Dive Into Autumn Delights
-
Aesthetic and Design4 weeks ago
Tiny Oasis: Mini Swimming Pool Ideas
-
Aesthetic and Design4 weeks ago
Small Wonders: Small Garden Swimming Pool Ideas
-
Aesthetic and Design4 weeks ago
Simple Solutions: Easy Swimming Pool Ideas