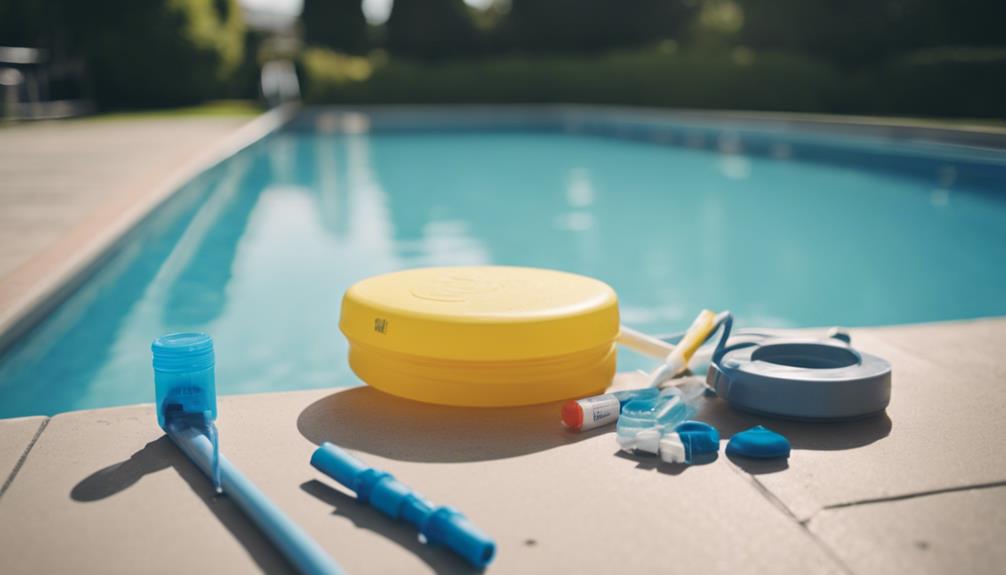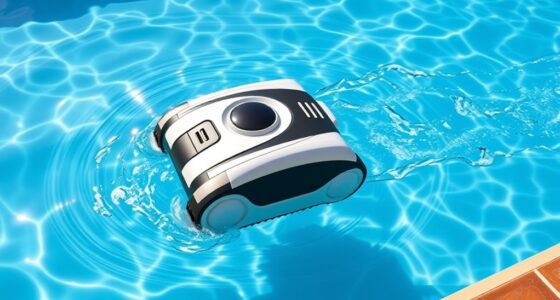
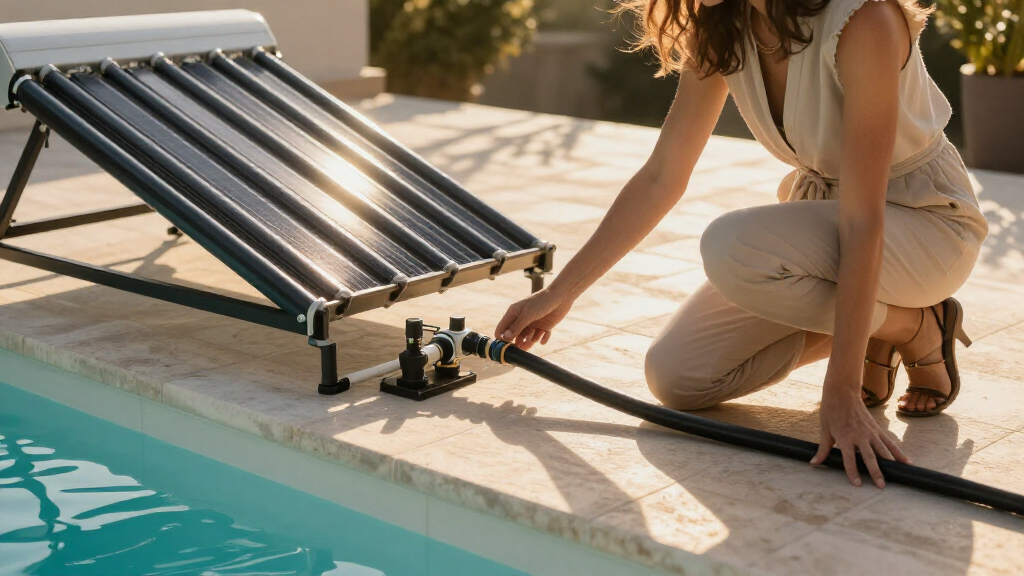

This guide walks you through installing a solar-powered pool heater on an existing in-ground or above-ground pool. When finished, you will have flat-panel solar collectors mounted on a roof or rack, plumbed into your pool’s circulation system, with a manual or automated bypass valve that directs water through the collectors when the sun is out. A properly sized and installed system typically raises pool water temperature by 8-15°F (4-8°C) above an unheated pool, extends your swim season by weeks or months, and adds nothing to your monthly electricity bill because it runs entirely off your existing pool pump.

Get pool and patio gear delivered free with Prime
- Fast, free delivery on millions of items
- Prime Video, Amazon Music and more included
- Member-only deals all year

Intex Solar Pool Water Heater Mat for Above-Ground Pools
- ✔ Heating surface: 11 square feet
- ✔ Temperature increase: Approximately 5 to 9 degrees, weather-dependent
- ✔ Dimensions: 47.25 x 47.25 inches (flat)

GoFloats V2 Inflatable Solar Pool Heaters, 3-Pack
- ✔ Quantity: 3 heaters per pack
- ✔ Dimensions: 5 ft × 5 ft each
- ✔ Coverage: 25 square feet each, 75 square feet total

VINGLI Solar Pool Heater for Above-Ground Pools
- ✔ Power source: Solar
- ✔ Design: Domed coil
- ✔ Compatibility: Above-ground pools
This guide is written for a confident DIYer. You do not need plumbing trade experience, but you must be comfortable working on a ladder or roof, cutting and gluing PVC pipe, and basic electrical work if you choose an automated valve. If any of that sounds beyond your comfort level, hire an installer for the mounting and plumbing, since a leaking roof penetration or burst pipe is far more expensive than labor.
Expect 6-10 hours of hands-on work spread over one or two days: half a day for mounting and plumbing, plus time for glue curing and leak testing. Budget for panels sized to 50-100% of your pool’s surface area depending on your climate and how warm you want the water.
Difficulty: Intermediate | Time: 6-10 hours (across one or two days)
What You’ll Need
Tools & Materials:
- Solar pool heating panels (sized to 50-100% of pool surface area)
- 3-way diverter valve (manual or motorized)
- PVC pipe (1.5″ or 2″, matching your existing plumbing), elbows, couplings, and unions
- PVC primer and cement
- Panel mounting hardware (straps, clamps, or roof hooks rated for your roof type)
- Check valve (spring-type, rated for hot water)
- Pipe insulation for exposed runs
- Circular or hand saw for PVC, or a PVC cutter
- Drill with driver bits and masonry or roofing bits as needed
- Screwdrivers and adjustable wrenches
- Silicone roof sealant (for roof penetrations)
- Teflon tape
- Ladder and safety equipment (harness for roof work)
- Optional: motorized valve actuator with solar sensor controller
Knowledge:
- How to shut off and drain your pool pump and filter
- Basic PVC measurement, cutting, priming, and solvent welding
- Safe ladder and roof work practices
- Reading your existing pool plumbing layout (pump, filter, return line)
Check local building codes and HOA rules before buying anything — some jurisdictions require permits for roof-mounted panels, and some HOAs restrict visibility from the street. Confirm your roof can carry the load: filled solar panels add roughly 3-5 lbs per square foot, and most residential roofs handle this without issue, but an engineer or installer should confirm if your roof is old or damaged. Order panels sized to your pool: in warm climates like Florida or Arizona, 50-70% of pool surface area in collector area is usually enough; in cooler or windier climates, aim for 80-100%.
Pick a clear-weather window. You need two dry days if roof penetrations are involved, so sealant can cure.
Intex Solar Pool Water Heater Mat for Above-Ground Pools
The Intex Solar Heater Mat earns our top spot because it is the most complete package in this lineup: an 11-square-foot heating surface, a bypass valve to control flow, and hose adaptors for both 1.25-inch and 1.5-inch connections. Compared with the VINGLI coil heater, it delivers a stated temperature gain of roughly 5 to 9 degrees in a single unit, whereas the VINGLI realistically needs to be linked in multiples to achieve similar results. Installation is straightforward — the mat sits in line between your filter pump and the pool, so it heats water every circulation cycle rather than relying on surface coverage.The tradeoffs are real, though. That 5-to-9-degree figure is weather-dependent, and cloudy weeks will deliver far less. The mat is also capped at pumps of 1/3 HP or under 2,000 GPH, which excludes a meaningful share of larger above-ground setups. Unlike the GoFloats, it does nothing to prevent overnight heat loss, so pairing it with a pool cover is smart. Still, for pools up to 8,000 gallons with a compatible pump, this pick makes the most sense for balanced performance and simplicity.
Pros:
- Raises water temperature by approximately 5 to 9 degrees in good conditions
- Compatible with above-ground pools up to 8,000 gallons
- Includes a bypass valve and adaptors for 1.5-inch hoses
- Folds flat for compact off-season storage
Cons:
- Heating performance drops significantly in cloudy or cool weather
- Strictly limited to pumps of 1/3 HP or under 2,000 GPH
Best for: Owners of above-ground pools up to 8,000 gallons with a filter pump of 1/3 HP or less who want a plug-in heating upgrade
Not ideal for: Pools with stronger pumps, in-ground pools, or anyone expecting consistent heating in cloudy climates
Bottom line: The most balanced and complete solar heating option here, provided your pump falls within its clearly stated limits.
“The most balanced and complete solar heating option here, provided your pump falls within its clearly stated limits.”
GoFloats V2 Inflatable Solar Pool Heaters, 3-Pack
The GoFloats V2 takes a fundamentally different approach from the other two picks: instead of heating water as it circulates, these 5 ft × 5 ft inflatable panels float on the surface, absorbing solar heat by day and insulating the water at night. That dual function is unique in this lineup — the Intex mat and VINGLI coil add heat but do nothing to stop it escaping overnight, which is where most pools actually lose their warmth. Each panel covers 25 square feet, and the flat design is intended to tile together with minimal overlap, which makes coverage more efficient than traditional round rings.The honest limitation is scale. The manufacturer recommends covering at least 80% of your pool surface, which means a 3-pack of 75 total square feet really only suits modest pools — anything much larger will need additional units, and the cost adds up. Compared with the Intex, there is no pump compatibility to worry about, but there is also no plumbing integration; you simply deploy and retrieve the panels. This option stands out for simplicity and heat retention, and it works as a complement to gas or electric heaters by reducing how hard they have to work.
Pros:
- Heats during the day and insulates the pool at night
- No plumbing or pump compatibility requirements
- Flat tiling design minimizes wasted overlap between panels
- Works as a complement to gas and electric heaters
Cons:
- Best results require covering at least 80% of the pool surface
- Larger pools will need multiple additional heaters beyond the 3-pack
Best for: Owners of small to mid-sized pools who want zero-installation heating plus overnight insulation
Not ideal for: Large pools where covering 80% of the surface would require many additional units
Bottom line: The easiest way to add solar heating and cut overnight heat loss, as long as your pool is small enough for three panels to cover.
“The easiest way to add solar heating and cut overnight heat loss, as long as your pool is small enough for three panels to cover.”
VINGLI Solar Pool Heater for Above-Ground Pools
The VINGLI Solar Heater is the tinkerer’s choice: a compact domed coil that heats circulating water and, crucially, is designed to be linked with additional units. That modularity is its defining advantage over the fixed-format Intex mat — if your first unit underdelivers, you can scale up rather than start over. The two foldable legs let you angle the coil toward the sun, which the flat Intex mat cannot do, and the whole unit packs down small for winter storage. Hose-mount installation keeps setup simple, and a 1-year warranty adds a layer of reassurance neither competitor here matches.Be realistic about expectations, though. The manufacturer itself indicates you may need three or more linked heaters for faster or longer-lasting warming, so the single-unit price understates the true cost of a full setup. You’ll also need to keep pump pressure below 0.8 and remove the protective cover when heating, which means more active management than the set-and-forget GoFloats. This model is better suited to owners who enjoy optimizing their setup — tilting panels, daisy-chaining units — than to anyone wanting maximum warmth from a single purchase.
Pros:
- Modular design allows linking multiple heaters for more capacity
- Foldable legs enable sun-angle positioning and compact storage
- Simple hose-mount installation
- Includes a 1-year warranty
Cons:
- Realistically requires three or more linked units for meaningful warming
- Protective cover must be removed to heat water efficiently
Best for: Hands-on owners who want to start small and expand their solar heating capacity over time
Not ideal for: Buyers expecting a single unit to meaningfully warm a full pool
Bottom line: A scalable, warrantied coil heater that rewards patient buyers willing to build out a multi-unit setup.
“A scalable, warrantied coil heater that rewards patient buyers willing to build out a multi-unit setup.”
As an Amazon Associate we earn from qualifying purchases.
Before You Start
Three decisions must be made before you cut any pipe, because they determine everything else.
Panel location: Collectors need unobstructed sun from roughly 10 a.m. to 4 p.m. South-facing is ideal; west-facing is acceptable (it favors afternoon sun, which helps overnight heat retention). Tilt panels at approximately your latitude, or mount them flush to the roof slope for simplicity. Do not place panels where trees shade them for more than an hour or two per day — shaded panels contribute almost nothing.
Water flow direction through panels: Water must enter at the bottom of the panel array and exit at the top, so air rises out with the flow and doesn’t collect in the top rows. Plan your plumbing accordingly.
Plumbing route: The solar loop taps in after the filter (never before it — unfiltered water clogs the small channels in the panels) and returns to the pool’s return line. Locate your filter, pump, and return line, and map the shortest practical pipe route from the filter output to the panels and back. Measure the total vertical lift from pump to panels: if the panels sit more than one story above pump level and far from the equipment pad, verify your pump can deliver adequate flow — most 1 HP+ pumps can, but check the panel manufacturer’s minimum flow rate.
Finally, shut off power to the pool pump at the breaker and close valves or drain the filter line so you can cut into the plumbing dry.
Step-by-Step Instructions
Step 1: Shut down and open the pool plumbing loop
Switch off the pool pump at the breaker. Relieve pressure by opening the filter’s air relief valve, then close the valves upstream and downstream of the section you’ll cut into, if present. Place a bucket and towels under the return line where you plan to make your cuts — even a drained line holds a few cups of water.
Identify the exact point in the return line after the filter and any heater where you will install the 3-way diverter valve. Measure and mark the section of pipe to remove — typically the width of the valve plus two couplings.
Tip: Photograph the plumbing before you cut anything. If something goes wrong, the photo is your reference for restoring the original layout.
Check: Pump is off at the breaker, pressure gauge reads zero, and no water flows when you make a small test cut at the bottom of the marked section.
Step 2: Install the 3-way diverter valve in the return line
Cut out the marked pipe section with a PVC saw or pipe cutter, making square cuts. Dry-fit the 3-way valve so that the incoming filter flow enters the valve’s common port, one outlet continues straight to the pool return, and the other outlet points toward your new solar feed line. Rotate the valve handle to confirm it sends flow fully to the pool, fully to the panels, or split between them.
Prime both pipe ends and valve sockets, apply cement once the dry-fit checks out, and press each joint together with a quarter-turn twist. Hold each joint for 15-30 seconds so it doesn’t push apart.
Tip: Orient the valve so the handle is accessible and you can see its position indicator. If you plan to add a motorized actuator later, leave clearance above the valve for the unit.
Check: Valve is fully seated, glued joints show an even ring of cement around each socket, and the handle moves through all positions firmly without binding.
Step 3: Mount the solar panels
Carry the panels to the roof and lay them out in the planned array, leaving 1/4 to 1/2 inch between panels for expansion. Secure them with the manufacturer’s mounting straps or clamps, fastened to rafters, purlins, or a purpose-built ground rack. Check that each panel sits flat against the mounting surface with no sags or bulges that trap water or stress the absorber.
Drill the minimum number of holes needed if your mounting method requires roof penetrations. Set each fastener in silicone sealant and flash or cap every penetration per the sealant manufacturer’s instructions. Use tile hooks rather than drilling through tiles on a tile roof — cracked tiles leak.
Tip: Never walk directly on the panels and never drag them across an abrasive roof surface. Lift and carry each one with a helper if the roof is steep.
Check: Every panel is secured at all manufacturer-specified strap points, panels lie flat, and every roof penetration is sealed with visible sealant.
Step 4: Run the feed and return pipes to the panels
Run PVC pipe from the solar outlet of the 3-way valve up to the bottom inlet header of the panel array. Run a second pipe from the top outlet header back down to the pool return line, rejoining it downstream of the diverter valve. Support horizontal pipe runs every 4-6 feet and vertical runs every 8-10 feet with clamps. Install unions at the panel connections so panels can be removed for repair or winterization.
Install a spring-type check valve on the return line from the panels, positioned just above the diverter valve with the arrow pointing toward the pool. This stops water from backflowing and syphoning backward through the panels when the pump shuts off.
Prime and cement every joint as you go, keeping the pipes as short and straight as practical — each 90-degree elbow reduces flow.
Tip: Insulate any exposed pipe runs in cool climates. Uninsulated pipe loses much of the heat your panels just collected, especially overnight.
Check: Feed line enters the bottom header, return line exits the top header, check valve arrow points toward the pool, and all joints show even cement rings.
Step 5: Flush the system before startup
Open the diverter valve fully to the solar position before turning on the pump. Backwash or open a drain point downstream so the first flush of water — which will carry PVC shavings and cement residue — does not go straight into the pool. Run water through the loop for 1-2 minutes into a drain or waste area, then switch the valve to the pool-only position and repeat for a few seconds to clear the bypass leg.
Allow all glued joints to cure per the cement canister’s instructions before running full pressure — typically 2 hours minimum, 24 hours in cold weather.
Tip: Skipping the flush is the most common cause of clogged panel channels and cloudy pool water after installation.
Check: Flush water runs clear with no visible shavings, and glue cure time has fully elapsed.
Step 6: Start the pump and set the flow balance
Restore power to the pump. Run the system for 5 minutes with the valve in the full-solar position, watching every joint, panel header, and roof penetration for leaks. Adjust the diverter valve to send roughly 80-90% of flow to the panels — a slight bypass keeps flow velocity in the correct range and lets you fine-tune. Feel the panel headers: water should be warm at the outlet within 10-15 minutes of full sun, and the outlet pipe should feel noticeably warmer than the inlet pipe.
Wire the actuator and temperature sensors following the controller’s manual if you installed a motorized valve with a solar sensor controller. Set the desired temperature differential (typically 4-6°F) and let the controller manage the valve automatically.
Tip: Run the solar loop only during sunny hours. Circulating pool water through cold panels at night or on overcast days actively cools your pool.
Check: No leaks at any joint after 10 minutes of running, outlet pipe feels warm to the touch in sunlight, and pool return jets are flowing normally.
Step 7: Verify temperature rise over a full sunny day
Record the pool water temperature in the morning before peak sun, then record it again in the late afternoon. Compare the two readings over a full sunny day with the system running 6-8 daylight hours, and expect a rise of 3-6°F in one day for a correctly sized system in reasonable weather. Log the daily gains for your first week to learn what your system delivers.
Check: A measurable temperature gain of at least 3°F over one sunny day confirms the system is working correctly.
Common Mistakes to Avoid
- Undersizing the collector area for the pool and climate. — Calculate collector area as a percentage of pool surface area before ordering: 50-70% in warm climates, 80-100% in cool or windy climates. Adding panels later means re-plumbing the headers.
- Plumbing water in at the top of the panels instead of the bottom. — Always feed the bottom header and return from the top header. Reversed flow traps air at the top of the array, causing air locks, uneven heating, and panel damage.
- Omitting the check valve on the panel return line. — Install a spring-check valve on the return, arrow toward the pool. Without it, every pump shutdown syphons water backward through the panels and can collapse them.
- Running the solar loop at night or on cloudy days. — Turn the diverter to pool-only outside sunny hours, or install a solar sensor controller that opens the valve only when panel temperature exceeds pool temperature.
Troubleshooting
Problem: Pool temperature isn’t rising even in full sun.
Solution: Confirm the diverter valve is actually sending flow to the panels — feel the feed and return pipes; the return should be warmer. Check for an air lock by briefly loosening the top header cap to bleed air. If flow is weak, clean the filter and confirm the pump is sized for the vertical lift to the panels.
Problem: Leak at a glued PVC joint.
Solution: Shut off the pump and drain the line. Cut out the leaking joint completely and replace it with a new fitting and two couplings — surface sealant on a wet joint never holds. Do not simply smear cement over the leak.
Problem: Leak at a panel header or seam.
Solution: Isolate the panel with the valve and apply the manufacturer’s repair plug or patch kit at the leak point. Most flat-panel systems include repair plugs sized to the tube diameter. Replace the panel if the header itself is cracked.
Problem: Jets in the pool weakened after installation.
Solution: The added head from lifting water to the panels may exceed the pump’s capacity. Rebalance the diverter valve toward more bypass flow, clean the filter, or upgrade the pump. Persistent weak flow on a two-story roof usually requires a larger pump.
What Success Looks Like
Your installation is successful when all of the following are true: the pump runs quietly with no leaks at any joint, valve, or roof penetration after 15 minutes of operation; the pipe returning from the panels is noticeably warmer than the feed pipe during midday sun; the pool gains at least 3°F over a full sunny day with the system running; and the diverter valve switches cleanly between pool-only and solar modes. With a motorized controller, the valve should open automatically when the panel sensor reads a few degrees above pool temperature and close when it drops below it.
Next Steps
Establish a routine for the first season. Run the solar loop only during sunny hours — manually or via the controller — and log daily temperature gains for two weeks so you know what output to expect. Check joints and panel straps monthly during the season, since thermal expansion works fittings loose over time.
Before freezing weather, drain the panels and solar piping completely (most systems have drain ports at the low points) and leave the diverter in pool-only position for winter. On roofs in hail regions, inspect panels after any severe storm.
If your pool stays cooler than target despite correct operation, the next steps are adding collector area, adding a pool cover to cut overnight heat loss (often the single highest-impact upgrade), or repositioning panels if shading patterns changed with tree growth. For persistent flow problems on complex roof lines, bring in a pool plumbing professional to evaluate pump sizing.
Frequently Asked Questions
How much does a DIY solar pool heating system cost?
Panel kits for a typical 15×30 ft pool run $150-$350 per 4×12 ft panel, so a full system usually lands between $1,500 and $3,500 in materials including valve, pipe, and fittings. Professional installation typically adds $2,000-$4,000. Compare that to a heat pump at $2,500-$5,000 plus ongoing electricity, and solar usually pays for itself in 2-4 seasons of avoided heating cost.
Can solar panels heat my pool in winter?
Only marginally. Unglazed flat-panel collectors work well when daytime air temperature is above roughly 55°F, but they lose effectiveness below that and must be drained before any freeze. If you want winter swimming in a cold climate, solar alone won’t do it — you’d need a gas heater or heat pump, with solar as a supplement.
Will my existing pool pump handle the extra lift to the roof?
Most 1 HP and larger pumps on single-story homes handle the lift without issue, since solar pool heating is a low-pressure, high-flow application. Panel manufacturers publish a minimum flow rate (commonly 3-5 GPM per panel). If your panels sit two stories up or a long pipe run away, check your pump curve against the added head, or budget for a pump upgrade.
Do I need a controller or is a manual valve enough?
A manual 3-way valve works fine if you’ll switch it morning and evening, and it’s the cheapest reliable setup. A motorized valve with a solar sensor controller ($300-$600) opens the solar loop only when panels are warmer than the pool and closes automatically during clouds or rain — it typically pays for itself in a season or two by preventing heat losses and removes the daily task.
How long do solar pool heating panels last?
Quality polypropylene panels last 10-20 years in moderate climates, though intense UV exposure in desert regions and hard freeze cycles without winterization shorten lifespan. Most manufacturers warranty panels for 10-12 years. Keep trees trimmed to reduce debris damage and drain the system before freezing to maximize lifespan.