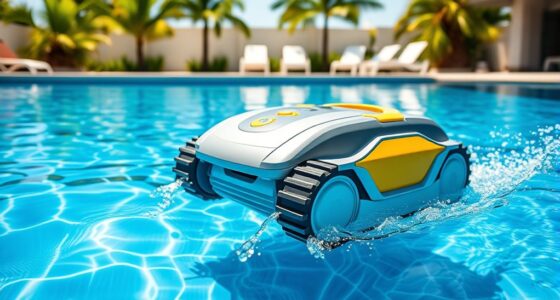
To replace worn parts on your robotic pool cleaner, start by inspecting for signs like poor cleaning, strange noises, or reduced suction. Gather compatible replacement parts such as brushes, tracks, filters, or the power cord from trusted sources. Carefully remove damaged components, following safety guidelines, and install new ones, ensuring proper fit and calibration. Regular maintenance prevents future issues. For detailed steps on each part, keep exploring—this guide will walk you through the entire process.
Key Takeaways
- Inspect brushes, tracks, filters, and the power supply regularly to identify signs of wear or damage before replacement.
- Verify compatibility of replacement parts with your model using the user manual or manufacturer specifications.
- Disconnect power and carefully remove worn components, noting their connections for accurate reinstallation.
- Replace drive belts, brushes, filters, or other worn parts with compatible, high-quality replacements from trusted suppliers.
- Test the robotic pool cleaner post-repair to ensure proper operation and address any issues immediately.

Sepetrel 17.5" Pool Brush Head for Cleaning Walls,Heavy Duty Inground/Above Ground Swimming Pool Scrub Brushes with Premium Strong Bristle & Reinforced Aluminium Back
The brush features a reinforced aluminum alloy metal structure that is not only sturdy and durable but also…
As an affiliate, we earn on qualifying purchases.
As an affiliate, we earn on qualifying purchases.
Identifying Signs of Wear and Tear

Understanding the signs of wear and tear on your robotic pool cleaner is essential to keeping it running smoothly. One common issue is sensor malfunctions, which can cause the cleaner to miss spots or stop working altogether. If your robot seems to ignore obstacles or isn’t following its usual cleaning pattern, sensors might be failing. Additionally, battery degradation is a clear sign of deterioration. If your cleaner’s runtime shortens considerably or it takes longer to recharge, the battery likely needs attention. Keep an eye out for inconsistent performance, unusual noises, or the device shutting down unexpectedly. Recognizing these signs early helps you determine when parts are wearing out and need replacement, preventing further damage and ensuring your pool stays clean. Regular Kia Tuning upgrades and maintenance can also improve the overall performance and longevity of your robotic cleaner. Monitoring overall device performance can help you catch issues before they become serious. Paying attention to filter efficiency can also indicate when internal components may be compromised or require cleaning. Additionally, routine inspections can help identify early signs of wear before major failures occur, especially in components susceptible to wear and tear over time.

HTH 67227 Swimming Pool Care Filter Cleaner, Quickly and Effectively Cleans and Prolongs Life of Pool Filter, Improves Filtration Efficiency, Compatible with All Filter Types, 32oz
BENEFITS: Clears out all the gunk that the swimming pool filter catches so that it can continue to…
As an affiliate, we earn on qualifying purchases.
As an affiliate, we earn on qualifying purchases.
Gathering the Necessary Replacement Parts
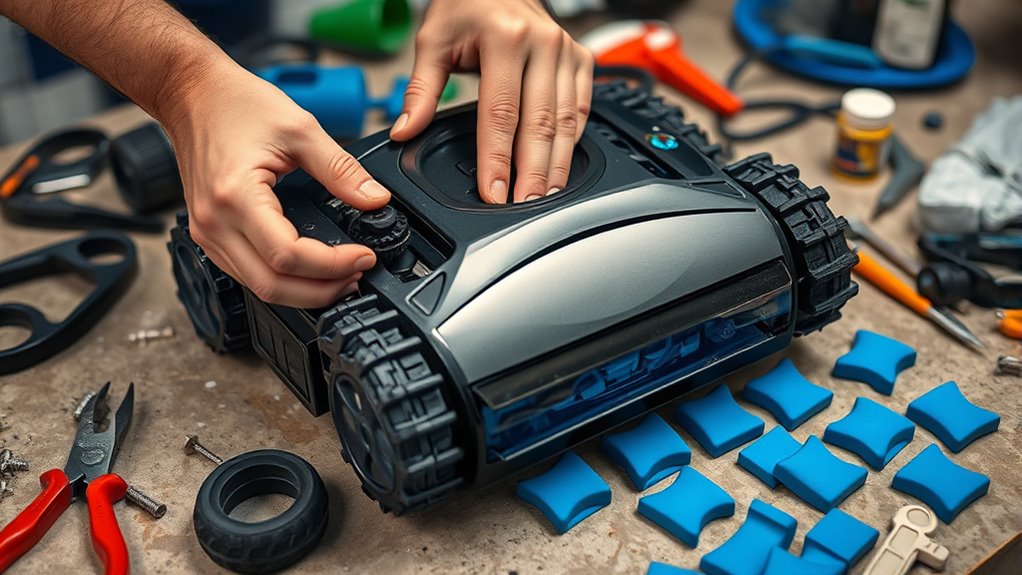
First, you need to identify which parts require replacement and make a list of those components. Next, find compatible parts from trusted sources to guarantee they fit and work properly. Ensuring proper fit during this process is crucial for optimal operation. Additionally, verifying local regulations can help prevent legal issues during installation. Consulting manufacturer specifications can further ensure you select the correct parts for your model. Finally, double-check the compatibility details to avoid any mismatches or installation issues. Compatibility verification is essential to ensure that the parts will integrate seamlessly with your robotic pool cleaner. Real couples often share their experiences and insights on maintaining strong relationships, which can serve as a reminder of the importance of attention to detail and compatibility in all areas of life.
Identify Required Parts
To effectively replace worn parts on your robotic pool cleaner, you need to identify exactly which components require attention. Start by inspecting the brushes, tracks, and filters for signs of wear or damage. Check the battery for issues related to battery maintenance, such as reduced run time or difficulty holding a charge. Also, ensure the software is up to date, as outdated software can cause performance problems that mimic hardware issues. Refer to your user manual to confirm which parts are compatible with your model. Make a list of all worn or malfunctioning components, including any damaged cables or seals. Proper identification helps you gather the right replacement parts, which ensures a smooth repair process and peak functioning of your pool cleaner. Additionally, reviewing performance tuning tips can help you maintain optimal operation after repairs. Regular preventive maintenance can also extend the lifespan of your robotic pool cleaner and prevent future issues. Being aware of component wear patterns can aid in early detection of potential failures, saving time and repair costs.
Source Compatible Components
Before purchasing replacement parts, it’s essential to verify they are compatible with your specific robotic pool cleaner model. Check the manufacturer specifications to ensure the parts match exactly, avoiding issues related to material compatibility. Using components designed for your model guarantees proper fit and function, reducing the risk of damage or malfunction. When sourcing parts, stick to reputable suppliers or the manufacturer’s recommended vendors to ensure authenticity. Avoid generic or off-brand components unless you confirm they meet the required specifications. Confirm that the replacement parts are intended for your cleaner’s make and model to maintain ideal performance. Proper sourcing not only prolongs your cleaner’s lifespan but also helps you avoid costly mistakes or compatibility problems down the line. Additionally, understanding self-watering plant pots can offer insights into maintaining optimal conditions for your pool cleaner’s components, ensuring longevity and reliability.
Verify Compatibility Details
Ensuring you gather the correct replacement parts begins with carefully verifying their compatibility with your robotic pool cleaner. Start by checking the battery compatibility to ensure the new battery matches your model’s voltage and connector type. Next, review the motor specifications, confirming the replacement motor’s size, power output, and mounting points align with your cleaner’s requirements. Additionally, comparing part numbers and manufacturer details can help avoid mismatched components. Furthermore, practicing mindfulness during this process can help you notice subtle differences that might affect the fit or function of parts. Consulting Honda Tuning resources can provide insights into compatible performance parts that might enhance your cleaner’s efficiency. Incorporating automation technology insights can help you understand how to optimize your device’s performance further. To help you stay organized: 1. Confirm the battery’s voltage and connector type. 2. Match the motor’s specifications with the original model. 3. Verify part numbers against the manufacturer’s list. Paying attention to compatibility checks ensures your parts will fit properly and work efficiently, extending your cleaner’s lifespan.
ArrogantF RCX97501GR Drive Belt Replacement for Hayward Pool Vacuum Robotic Cleaner,fit for Hayward SharkVac XL and Aquavac 500 Robotic Pool Cleaner Parts
Fit for Hayward Pool Pump Parts: Fit for Hayward SharkVac XL and Aquavac 500 Pool Vacuum Robotic Cleaner
As an affiliate, we earn on qualifying purchases.
As an affiliate, we earn on qualifying purchases.
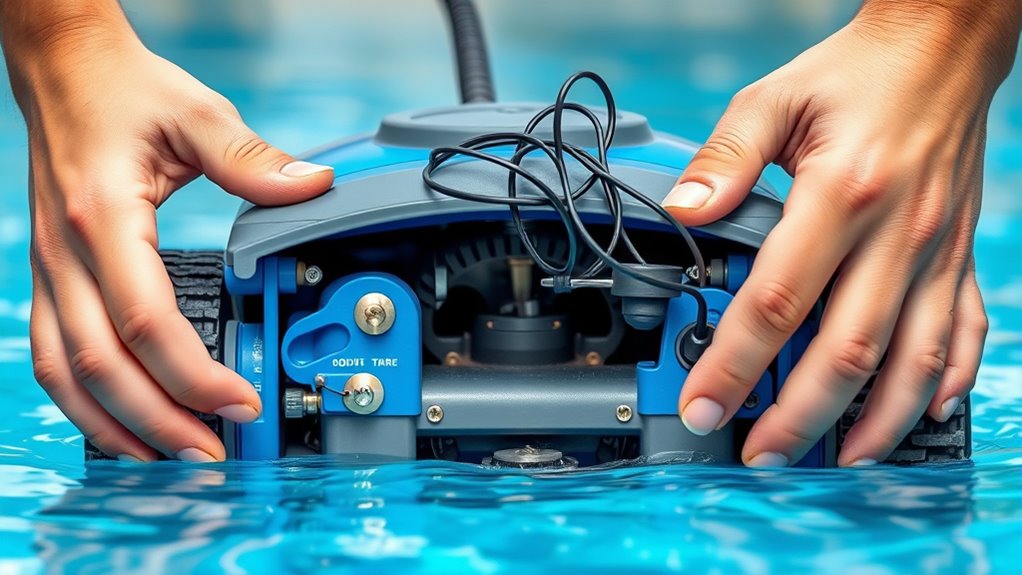
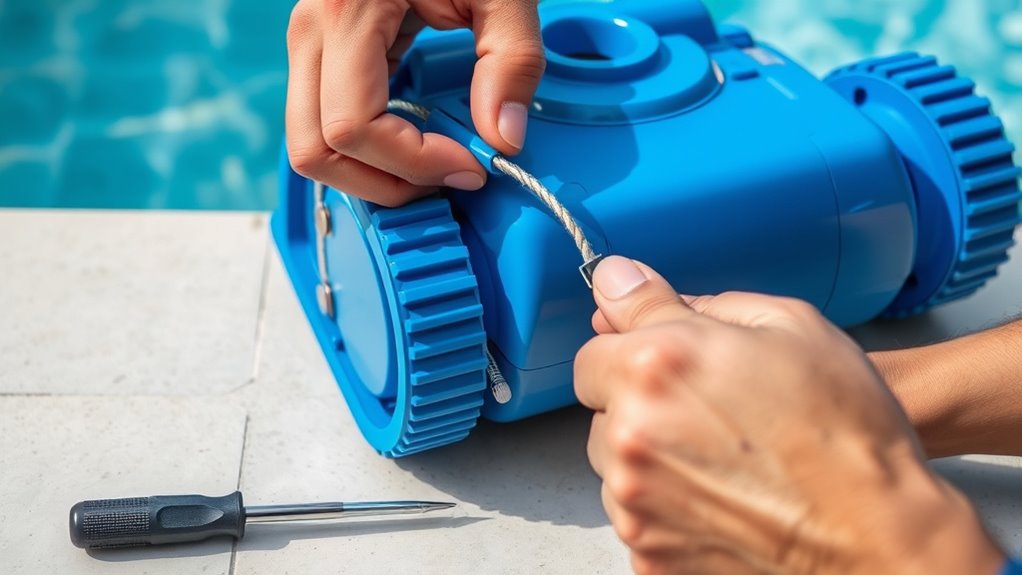
Removing Old or Damaged Components Safely
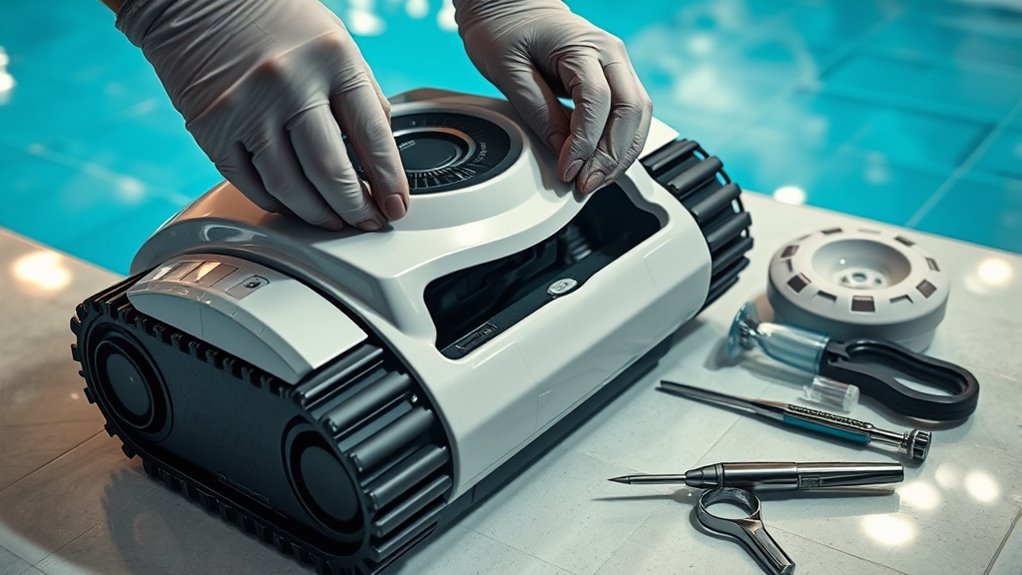
Before removing old or damaged parts, make certain you follow safety precautions to safeguard yourself. Use proper techniques to avoid damaging other components or causing injury. Taking your time and staying cautious ensures a smooth and safe removal process.
Safety Precautions First
To remove old or damaged components safely, you need to prioritize your personal protection and prevent damage to the cleaner. First, disconnect the cleaner from power sources to avoid electrical hazards. Second, handle any chemicals, like cleaning solutions or residual pool chemicals, with care—wear gloves and eye protection to prevent irritation or injury. Third, ensure you work in a dry, well-ventilated area to minimize risks associated with electrical safety and chemical handling. Always double-check that power is off before starting. Avoid rushing, and use insulated tools when necessary. Taking these precautions helps prevent electric shocks, chemical exposure, and accidental damage, making the replacement process safer and more effective.
Proper Removal Techniques
When removing old or damaged components from your robotic pool cleaner, it’s essential to proceed carefully to avoid causing further damage or injury. Start by disconnecting the power supply and removing the battery, if applicable, to ensure safe battery maintenance. Gently detach worn parts like brushes or wheels, noting how they’re connected for easy reinstallation. When removing components related to programming updates, such as control boards, handle them with care to prevent static damage. Use appropriate tools to avoid stripping screws or damaging housings. Maintain a clean workspace to prevent losing small parts. Proper removal techniques help preserve the integrity of your device, making reassembly smoother and ensuring your robotic cleaner functions efficiently after the new parts are installed.

58984402L Black Power Cord Digital Power Supply Cable Parts Fit for Maytronics Dolphin Pool Cleaners Power Supply Unit, Replacement for Part Number 5898412LF, 58984402LF
APPLICATION: The 58984402LF black power cord is compatible with Dolphin most models, fit for Dolphin Nautilus Plus, Nautilus,…
As an affiliate, we earn on qualifying purchases.
As an affiliate, we earn on qualifying purchases.
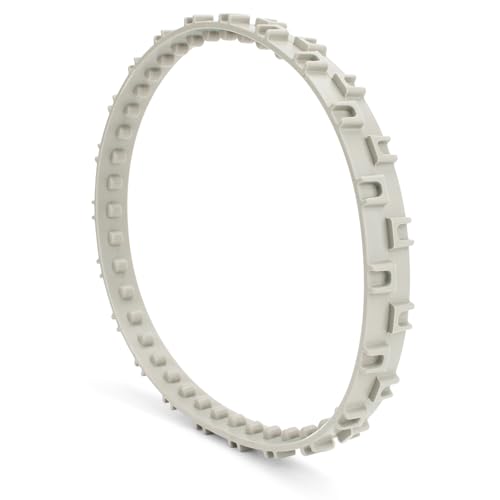
Replacing the Drive Belt or Tracks
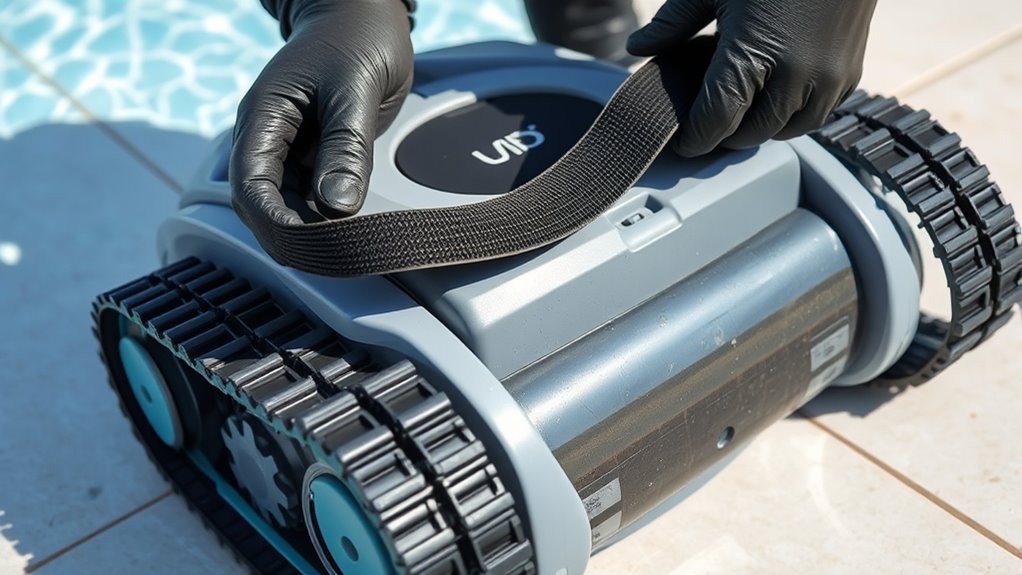
If your robotic pool cleaner isn’t moving smoothly or seems to be slipping, it’s likely time to replace the drive belt or tracks. Regular drive belt maintenance ensures peak performance, while proper track adjustment keeps your cleaner running efficiently. Here’s what to do:
- Remove the cover and inspect the belt or tracks for wear or damage.
- For the drive belt, gently detach it from the pulleys, noting its routing for easy replacement.
- If replacing tracks, loosen any fasteners and carefully remove the old ones before installing new tracks with correct tension.
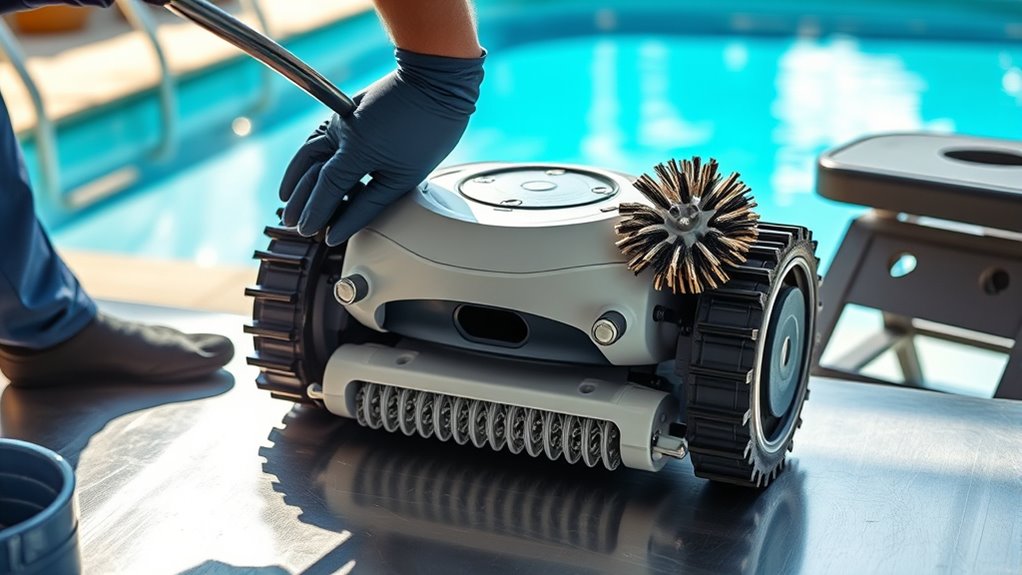
Swapping Out the Brushes and Nozzles
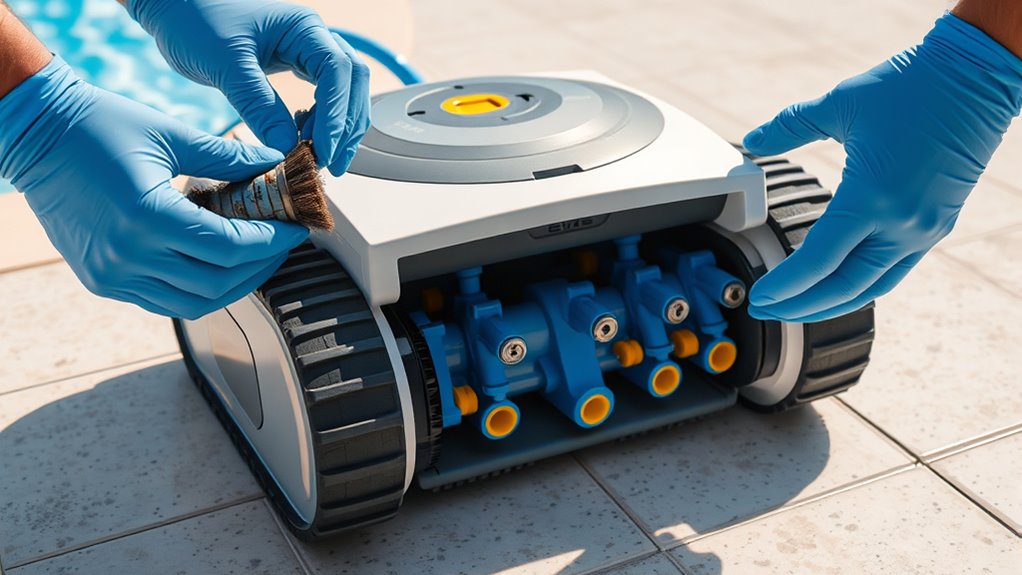
After replacing the drive belt or tracks, it’s a good idea to check the brushes and nozzles for wear. Worn brushes can reduce cleaning efficiency, so swap them out if they’re frayed or misshapen. Nozzles may clog or become damaged, affecting water flow and debris pickup. When replacing these parts, ensure the robot arm is properly calibrated to maintain ideal cleaning paths. This might involve minor adjustments or following specific calibration procedures. Additionally, check if your robot’s software update procedures include firmware updates that improve brush and nozzle performance or compatibility. After installing new brushes and nozzles, run a quick calibration cycle to confirm everything functions correctly. Proper maintenance ensures your robotic pool cleaner stays efficient and prolongs its lifespan.
Replacing the Filter and Cleaning the Housing
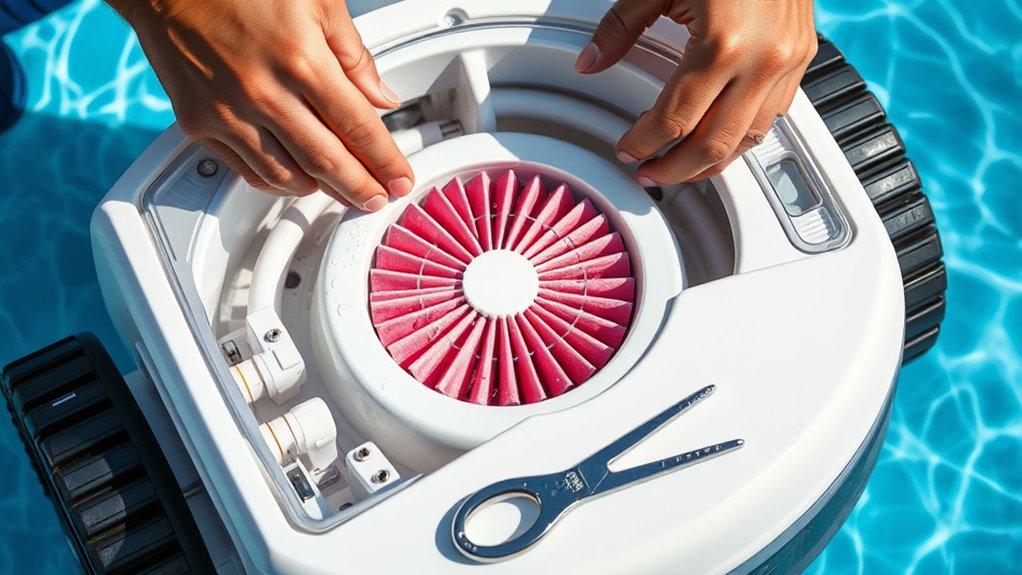
Replacing the filter and cleaning the housing are essential steps to keep your robotic pool cleaner operating efficiently. Regular filter maintenance prevents clogs and ensures maximum suction, while housing cleaning removes debris that can hinder performance. To do this:
Regularly replacing filters and cleaning the housing keep your robotic pool cleaner running smoothly.
- Remove the filter carefully, rinse it with water, and check for tears or buildup.
- Clean the housing thoroughly with a soft cloth or brush, removing dirt and debris.
- Reassemble the filter and housing, making sure everything fits snugly.
Performing these tasks regularly keeps your cleaner running smoothly and extends its lifespan. Proper filter maintenance and housing cleaning prevent motor strain and maintain cleaning efficiency. Stay on top of these steps to enjoy a pristine pool with minimal hassle.
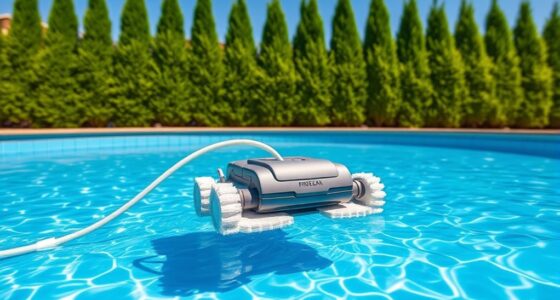
Checking and Replacing the Power Supply or Cord
Regularly inspecting the power supply and cord guarantees your robotic pool cleaner stays powered and functions properly. Start with electrical cord inspection to check for cuts, frays, or exposed wires. If you notice any damage, replace the cord immediately to prevent electrical hazards. For power supply troubleshooting, ensure the unit is plugged in securely and the outlet has power by testing it with another device. If the power supply isn’t working, try resetting any circuit breakers or replacing the power adapter if possible. Avoid using damaged cords or power supplies, as they can cause malfunction or safety issues. Regular checks help you catch issues early, keeping your robotic cleaner running smoothly and extending its lifespan.
Testing the Robot for Proper Functionality
To guarantee your robotic pool cleaner is working correctly, you should test its functionality after performing any maintenance or part replacements. First, turn on the robot and check its battery life by observing how long it runs without needing a recharge. Next, use the remote control to test responsiveness and ensure all commands are executed smoothly. Finally, observe the robot’s movement and cleaning pattern to confirm it navigates properly and covers the pool surface evenly. Be sure to verify that the brushes and suction functions are working efficiently. If you notice any issues with battery life, remote control response, or movement, troubleshoot or recheck the replaced parts. Proper testing guarantees your pool cleaner operates effectively and extends its lifespan.
Frequently Asked Questions
How Often Should I Inspect My Robotic Pool Cleaner for Wear?
You should follow an inspection schedule that checks your robotic pool cleaner regularly. Look for wear indicators such as frayed brushes, cracked wheels, or clogged filters. Typically, inspecting every 2-4 weeks keeps you ahead of potential issues. By staying vigilant, you guarantee your cleaner runs efficiently and prolongs its lifespan. Regular checks help you catch problems early, saving you time and money on repairs or replacements down the line.
Can I Replace Parts Myself or Do I Need Professional Help?
You can often handle DIY maintenance and replace worn parts yourself if you’re comfortable with basic tools and follow instructions carefully. Many robotic pool cleaners come with detailed guides for part replacement. However, if the task seems complicated or involves electrical components, it’s best to seek professional repair. This guarantees safety, proper installation, and avoids voiding any warranties. Always weigh your skill level before attempting DIY repairs.
What Safety Precautions Should I Take During Replacement?
When replacing worn parts on your robotic pool cleaner, you should prioritize safety. Always practice electrical safety by unplugging the device before starting. Use proper tools to avoid injuries or damage, and handle parts carefully to prevent cuts. Keep your workspace dry and well-lit, and follow the manufacturer’s instructions closely. Taking these precautions helps guarantee a safe and effective replacement process, preventing accidents and prolonging your cleaner’s lifespan.
Are There Compatible Aftermarket Parts Available?
Like a painter choosing vibrant colors, you have plenty of options when it comes to aftermarket compatibility for your robotic pool cleaner. Third-party options can be a budget-friendly way to extend your device’s life, but make sure they’re compatible with your model. Many aftermarket parts are designed to fit certain brands, so check reviews and specifications carefully to avoid a mismatch that could leave you in a pool of trouble.
How Long Does a Typical Part Replacement Process Take?
When you replace a part, it usually takes about 30 minutes to an hour, depending on your experience. Stick to your maintenance schedule to prevent unnecessary repairs. Use troubleshooting tips to identify issues early, making replacements smoother. Before starting, gather the necessary tools and parts. Regular upkeep minimizes downtime, ensuring your robotic pool cleaner stays in top shape and operates efficiently, saving you time and money.
Conclusion
Just like giving your car a tune-up, replacing worn parts on your robotic pool cleaner keeps it running smoothly. By regularly checking for signs of wear and swapping out components when needed, you’ll extend its lifespan and maintain peak performance. Think of it as giving your cleaner a fresh set of shoes—comfortable and ready to tackle the pool. With a little effort, you’ll keep your pool sparkling and your robot happily working like a well-oiled machine.