
Update your pool steps by draining and cleaning them thoroughly before starting the repair process. Identify and mark the crack precisely to ensure proper treatment. Apply a generous amount of surface primer and ensure even coverage with bonding filler. Smooth out the crack by sanding it down and wiping away any dust for a seamless finish. Finish off with epoxy paint for long-lasting durability and improved aesthetics. Following these steps will lead you to beautifully restored pool stairs that enhance both the look and safety of your pool.
Key Takeaways
- Drain and clean pool stairs thoroughly for maintenance.
- Locate and prep crack on stairs before repair.
- Apply surface primer and filler for a strong bond.
- Smooth, sand, and dry the crack for a flawless finish.
- Finish with epoxy paint for a durable and attractive look.
Drain & Clean Pool Stairs
Before starting the repair process, it is essential to drain and thoroughly clean the pool stairs to guarantee maximum adhesion and effectiveness of the repair materials.
Start by attaching a hose to the pool's drain outlet on the filter to drain the water into a safe area. Once the water is drained, close the drain valve and turn off the filter. Make sure the water level exposes the crack for easy access during repairs.
Subsequently, clean the pool stairs diligently, ensuring they are free of any debris, dry, and chlorine-free. This step is necessary for enhancing the adhesion of the repair materials and improving the overall durability of the repair.
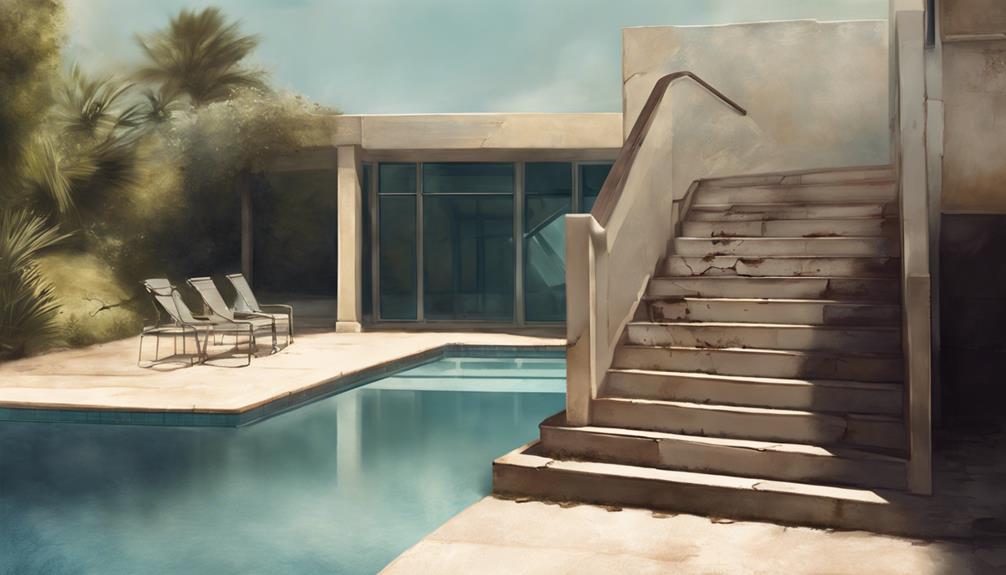
Locate & Prep the Crack
To effectively initiate the repair process, the first step is to accurately locate the crack on the pool stairs before proceeding with proper preparation. Pinpoint the crack's location and mark it with a pencil to avoid confusion during repair. Thoroughly clean the crack to ensure no debris or dirt remains, preparing the surface for repair materials and enhancing the repair durability. For a smooth repair process, it is essential to clean and prep the crack adequately.
| Locate the Crack | Clean & Prep the Crack |
|---|---|
| – Pinpoint crack location | – Thoroughly clean the crack |
| – Mark crack with a pencil | – Ensure no debris or dirt remains |
| – Avoid confusion during repair | – Prepares surface for repair materials |
| – Ensure accurate repair area | – Increases repair effectiveness |
| – Prevent mistakes in the repair process | – Enhances repair durability |
Apply Surface Primer & Filler
Begin the surface repair process by generously applying the surface primer to the prepared crack, ensuring thorough coverage for best adhesion. This step is essential in creating a strong bond between the repair materials and the cracked surface.
Follow these steps to effectively apply surface primer and filler:
- Apply the Primer: Use a paintbrush to apply the surface primer generously over the crack.
- Ensure Even Coverage: Make sure the primer covers the entire cracked area for ideal adhesion.
- Allow Drying Time: Let the primer dry completely before moving on to applying the bonding filler.
- Apply Bonding Filler: Once the primer is dry, use a putty knife to apply the bonding filler along the crack, ensuring a smooth and even application.
Smooth & Sand the Crack
After applying the bonding filler, the next step in the repair process is to smooth and sand the crack to achieve a seamless and even surface. Sanding over the filler helps in achieving a smooth texture, guaranteeing a professional finish. By wiping away dust with a damp cloth, you can prepare the crack for the next steps in the repair process. Allow the filler to dry completely before sanding to avoid any imperfections. This step is essential in achieving a flawless repair on your pool stairs.
| Steps to Smooth & Sand the Crack | Details |
|---|---|
| 1. Sand over the filler | Achieve smooth texture |
| 2. Apply pressure for evenness | Ensure seamless surface |
| 3. Wipe away dust | Prepare for next steps |
| 4. Wait for filler to dry | Avoid imperfections |
Finish With Epoxy Paint
Complete the repair process by applying a coat of epoxy paint to the smoothed and sanded crack on your pool stairs. Epoxy paint serves as a protective and decorative finish, guaranteeing the repaired area blends seamlessly with the rest of the stairs.
Here are four essential steps to finish the repair with epoxy paint:
- Mix Epoxy Paint: Follow the manufacturer's instructions to properly mix the epoxy paint for best adhesion and durability.
- Apply Even Coat: Use a paintbrush to apply an even coat of epoxy paint over the repaired crack, covering the entire area smoothly.
- Allow Drying Time: Let the epoxy paint dry completely according to the recommended drying time to achieve a strong finish.
- Inspect and Touch Up: Once dried, inspect the painted area for any imperfections, and touch up as needed to achieve a flawless final look.
Frequently Asked Questions
Can I Use Regular Paint Instead of Epoxy Paint for the Final Step?
For the final step of repairing cracked pool stairs, it is recommended to use epoxy paint rather than regular paint. Epoxy paint is specifically designed for underwater applications, providing greater durability and longevity to the repair.
How Long Should I Wait for the Surface Primer to Dry Before Applying Filler?
The surface primer used for repairing pool stairs should be allowed to dry fully before applying filler. Typically, it is recommended to wait for the primer to dry completely, which can range from 30 minutes to a few hours depending on the product.
Is It Necessary to Wear Gloves and a Dust Mask When Using the Rotary-Stone Drill Bit?
When using a rotary-stone drill bit, wearing gloves and a dust mask is vital. Protect your hands from potential injuries and shield your respiratory system from harmful dust particles. Safety measures are essential during such tasks.
Can I Apply the Bonding Filler Over a Damp Surface?
It is not recommended to apply bonding filler over a damp surface. Ensuring the crack area is thoroughly dry before applying filler is essential for the bonding process. Moisture can hinder the adhesion and effectiveness of the repair.
How Long Should I Let the Filler Dry Before Sanding It Smooth?
Before sanding the filler for a smooth surface, make sure it is fully dried. The best drying time varies by product, typically ranging from 2-4 hours. Following manufacturer instructions is essential to achieve the desired repair outcome.
How Can Pool Waterfalls Enhance the Appearance of Your Pool Stairs?
Adding stunning pool waterfalls to your pool stairs can greatly enhance the overall appearance of your pool area. The cascading water not only adds a sense of tranquility but also creates a visually appealing focal point. With the right stunning pool waterfalls tutorial, you can easily elevate the look and feel of your pool.
How Can Adding Waterfalls to My Pool Also Improve the Pool Stairs?
Adding stunning pool waterfalls can also enhance the pool stairs. The cascading water can act as a natural sound barrier, reducing noise around the stairs. Additionally, the visual appeal of the waterfalls can make the entire pool area more inviting, encouraging swimmers to utilize the stairs more frequently.
Conclusion
To wrap up, by following these steps, you can revamp your pool stairs and secure a safe and visually appealing swimming environment.
This guide offers a thorough approach to repairing cracked pool stairs, ensuring a seamless and durable restoration process.
Embrace these techniques as your ultimate tool for transforming your pool stairs with the power of a thousand suns.