
To capture motion and light in pool photography, focus on timing and lighting conditions. Use natural light during early morning or late afternoon for soft, flattering shadows, and experiment with angles to highlight reflections. Incorporate artificial underwater lights to enhance water clarity and create striking effects. Adjust your shutter speed to freeze or blur movement for dynamic shots. Mastering these techniques will help you craft compelling images, and exploring further will reveal even more ways to elevate your pool photography.
Key Takeaways
- Use slow shutter speeds to capture smooth motion, like swimming or splashes, while maintaining proper exposure with lighting adjustments.
- Shoot during early morning or late afternoon for softer natural light that enhances water clarity and reduces harsh reflections.
- Incorporate artificial underwater lighting to highlight water transparency, create reflections, and add depth to your images.
- Position yourself low and angle the camera to emphasize reflections and motion, creating more dynamic and artistic compositions.
- Experiment with different lighting angles and timing to capture varied reflections and enhance the sense of movement in your photos.
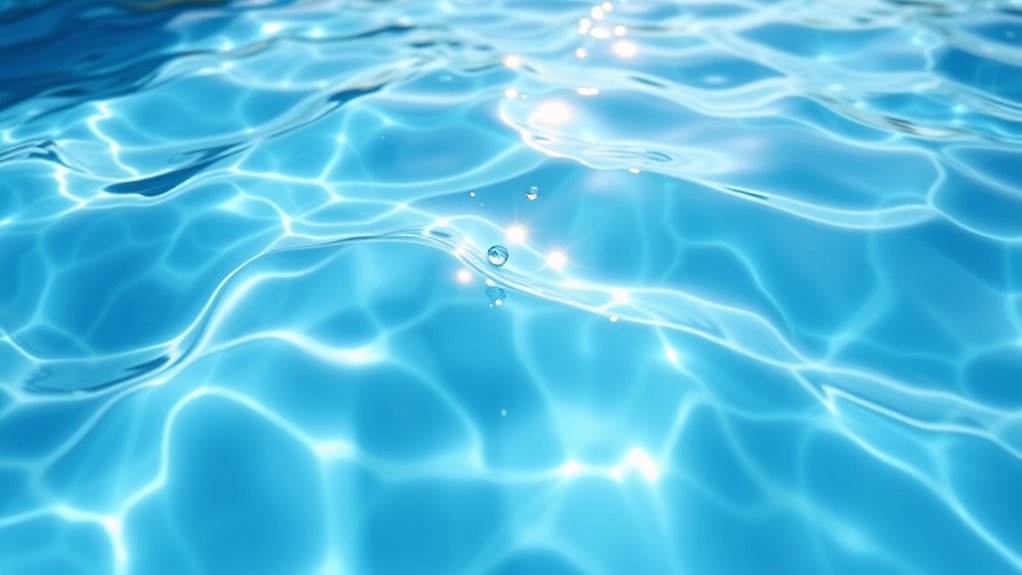
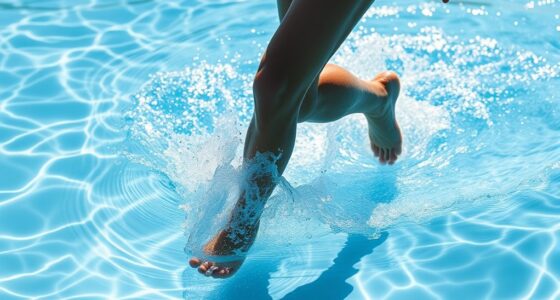
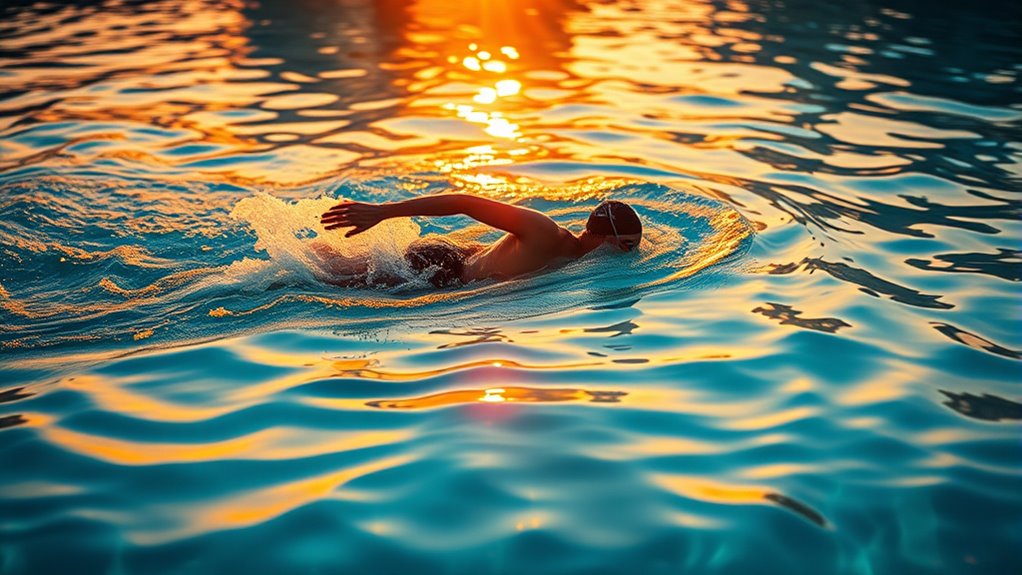
Capturing stunning pool photos requires more than just pointing your camera and clicking. To truly elevate your shots, you need to pay attention to the interplay of light and water. Underwater lighting is essential because it can dramatically alter the mood and clarity of your images. When shooting in or around a pool, consider the time of day; midday sun creates harsh reflections, while early morning or late afternoon offers softer, more flattering light. Using natural light effectively can reduce the need for extensive post-processing, but if you’re shooting underwater or at an angle that’s difficult to illuminate naturally, you might want to incorporate artificial underwater lighting. These lights can help highlight the crystal-clear water and create vibrant reflections, adding depth and texture to your photos. Position your lights carefully to avoid overexposure or unwanted glare, and experiment with angles to find the most appealing effect. Proper lighting placement plays a crucial role in achieving professional-looking results and avoiding distracting glare or shadows.
Reflection techniques play a pivotal role in pool photography. Water acts as a mirror, creating stunning symmetrical images when you use reflections creatively. To harness this, look for surfaces where the water’s surface is calm, as still water produces clearer, more defined reflections. Position yourself to capture reflections of swimmers, surrounding architecture, or the sky above, and try different angles to emphasize symmetry or distortion for artistic effect. Adjust your camera’s angle to maximize the reflection’s impact—sometimes shooting from a low angle just above the water’s surface can produce mesmerizing results. You can also experiment with reflections during different times of the day; the changing light conditions will influence how reflections appear and can add variety to your portfolio.

(2025 Upgrade) Beatbot AquaSense 2 Cordless Robotic Pool Vacuum Cleaner, Smart Surface Parking, Double-Pass Waterline Scrubbing, Cleans Floor, Walls and Waterline
【Effortless Retrieval with Auto Surface Parking & One-Click App Parking】No heavy lifting! AquaSense 2 pool vacuum automatically parks...
As an affiliate, we earn on qualifying purchases.
Frequently Asked Questions
What Camera Settings Are Best for Low-Light Pool Photography?
To shoot low-light pool scenes, set your camera’s sensor sensitivity higher, like ISO 800-1600, to capture more light. Use a wide aperture, such as f/2.8 or lower, to let in maximum light and create a pleasing background blur. Keep your shutter speed moderate to avoid motion blur but still capture the water’s motion. Adjust these settings based on the available light and desired effect.
How Can I Prevent Reflections From Ruining My Shot?
To prevent reflections from ruining your shot, use a polarized filter. It helps reduce glare and minimizes reflections from water and shiny surfaces. Position the filter correctly and shoot at different angles to find the best view with minimal reflections. Additionally, adjusting your angle relative to the light source can further decrease unwanted reflections, ensuring your pool photos are clear, sharp, and beautifully composed.
What Lenses Are Ideal for Capturing Underwater Motion?
For capturing underwater motion, you should use wide-angle lenses to encompass more of the scene and create dynamic shots, especially when photographing swimmers or moving water. Macro lenses are ideal for close-up details like bubbles or water droplets in motion. Both lens types allow you to adapt to different underwater scenarios, helping you freeze or emphasize movement effectively while maintaining clarity and vibrant light capture.
How Do I Protect My Camera Around Water and Chlorine?
To safeguard your camera around water and chlorine, always use a waterproof case designed for your model. This prevents water damage and keeps chlorine from harming internal components. Additionally, practice regular camera maintenance by rinsing your camera with fresh water after exposure to pool water and inspecting seals for wear. This ensures your gear stays in top condition and continues capturing stunning pool shots without worry.
What Editing Techniques Enhance Water Motion Effects?
Like a painter blending shades, you can enhance water motion effects using editing techniques. Apply water color enhancement to deepen blues and greens, making the motion more vivid. Use blur effect techniques selectively on parts of your image to create a sense of movement and fluidity. Combining these methods, you’ll transform static shots into dynamic scenes that evoke the lively and shimmering essence of water.
Techko S189 Ultra Slim Safe Pool Alarm for Kids, ETL Listed UL 2017 Compliant, Indoor/Outdor Weather Resistant, 110db Loud Alarm with 2X Bypass Buttons, Gray, 1Count
Pass Pool Inspections: Compliant with UL 2017 safety standards & Child Pool Safety Law
As an affiliate, we earn on qualifying purchases.
Conclusion
By applying these pool photography tips, you can effectively capture stunning shots that showcase motion and light. Don’t forget, using slow shutter speeds creates beautiful motion blur, while experimenting with angles adds depth. Curiously, some experts believe that capturing reflections in water can enhance your photos’ impact—so take the time to explore how light plays on the surface. With practice, you’ll discover that patience and experimentation truly elevate your pool photography skills.

iGarden Pool Cleaner K Series, 6H Cordless Robotic Pool Vacuum for Inground & Above Ground Pools, AI Timer, Smart Navigation, Floor, Walls&Waterline Scrubber, Touchscreen, Auto-Parking
One Charge, Lasts Over A Week: The iGarden Pool Cleaner K60 provides up to 6 hours of pool...
As an affiliate, we earn on qualifying purchases.
iGarden Robotic Pool Cleaner K Series, Cordless Pool Vacuum Robot for Inground & Above Ground Pools, Smart Navigation, Touchscreen, Self-Parking, Cleans Floor, Wall & Waterline, 150 Min
Robust Cleaning Capability: Engineered with a turbine-grade impeller, an optimized flow system, and 3 brushless motors, the cordless...
As an affiliate, we earn on qualifying purchases.